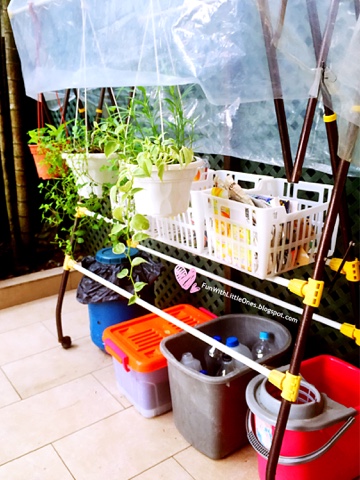
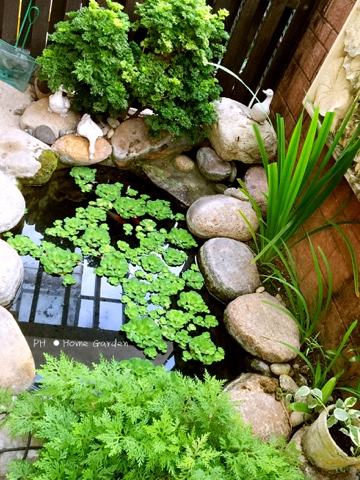
I have been busy with few important things lately, and one of the focuses is our home improvement and garden makeover. We have stayed in the current house for few years and Big Guy and I both agreed it is about time to give our garden a makeover. As working parents we had omitted our garden due to the long working hours and other commitments, since I am on a career break now, it's a perfect time to give the garden an uplift (plus a lot of other fixes..)
Let me take you on a virtual tour around our petite tropical garden.
P/S... You can read first part of our journal, let's grow vegetable here. It's part of our effort to teaching our kiddos to appreciate nature and love our Mother Earth.
Flower Garden
Our indoor pot garden filled with hydrangea, mini roses and lavender. One of my favorite spots in our garden.
I found them a perfect spot under the glass roof which allows direct sunlight. I was told to fertilize them every 10 days, let's hope I can continue to preserve them in such pretty state... *fingers crossed*
I am in love with the hydrangeas, they are truly heaven-sent. Mine only has a small bloom now, a long time before it turns all bushy but I have the patience..
I collected some cuttings from my neighbor and attempted to propagate them, hopefully I can have a hydrangea garden blooming in blue, pink and purple.
The sweet pink Petunia and the curious duck... This beauty cannot survive without direct sunlight and lots of water, so I gave them the most sunny spot in the backyard. Looking forward for them to grow and form a bed of flowers.. *pray hard*
In the meanwhile, the purple petunia always welcome us home with its beautiful blooms. Petunia seems to thrive best when hang under the tree.
Our beautiful Amaryllis Mrs Garfield planted from bulbs since we moved into this house and they had multiply themselves many times. They look like a delicate plant that requires tender loving care, but to my pleasant surprise they are actually very hardy and lasted the draught, the poor soil condition and even the ill treatment by the renovation workers who just cruelly yanked them out of the soil before I could stop them! This plant gave us beautiful blossom twice a year, although the blossom usually only last for about a week plus, I always admire its elegant beauty.
Added extra support for the heavy blooms. I've dug out many small bulbs from the ground and transplanted them to a recycled wine crate, let's hope they will all bloom one day..
We have some Spider Lilies too and they seem to be enjoying the shade under our heliconia plants. The flowers, comes in 8 (hence the name Spider Lily), emits really nice fragrance at night, I didn't realised until I walked passed it one night..
The outdoor pot garden using all the existing pots we had. Once the Torenia grow bushier and bloom, this would be such a breath taking sight. I once lost both of my Torenia plants due to mealy bugs attack (those sticky white mose), but luckily the plants managed to produced some offspring on the empty pots I left next to them. Torenia is easy to populate but seem to be a favorite to those mealy bugs, so make sure you have Neem oil spray ready.
More Torenia on the yellow bench made by my dad years ago. I shall keep the benches with me for as long as possible.
Japanese Roses, they may be cheap but they are true ever-lasting beauties. Just give them lots of sun and water, and they will not be shy to show you their true colors. I have a bright purple and mustard yellow ones in my pot garden. Propagating them is as easy as plucking a stem and poke it into the soil. It's that easy!
The beautiful doubled petals hibiscus in our front yard. This is a rare hibiscus species that is pinkish when young and turns blueish purple before withering. Love them, absolutely love them. Hope they will grow into a beautiful flower tree one day.. They seem quite easy to care, just ensure water them daily and add fertilized once a month, perfect for lazy bump like me. *smile*
Full bloom.
In full bloom again a week later.. Such a gem!
Edible Garden
Besides flowers, I wish to have an edible garden too so I can cook with our own garden produce, so despite I was labelled as black thumbs by Big Guy, I decided to give it a try.
• Pumpkins
I once had 2 butternut squash plants which had bear many flowers, but they died miserably after being with us for 8 weeks... So I have planted something different this time, some how I have a liking for crawling plants, let's hope these baby pumpkins have better luck...
• Baby cucumber
This picture was taken at 1 week old, it's growing at an amazing rate once it germinated. I put some dried crushed egg shells around it as natural fertilizer and protection from snails. Cucumber takes 90 days to harvest so it is still a long way to go for me.
2 weeks passed, growing well and a new sapling joins in.. I got the 75cm trellis from Daiso for RM5.30 each, shall be sufficient to support the cucumbers (I hope).
• Okra / Lady Fingers
Lady fingers is one of my family's favorite veggie so they are must have in our garden. They too need 70 days before harvest, growing good at 2 weeks old. Since they do not need trellis for support, I just put 4 of them in a planter pot.
• Chilis & More...
I love love love hot chilis, so these are must-have in my edible garden! A large green chili and a spicy chili padi, all given to me, let's hope they grow well as I was told they are mealy big magnet... *sweat* I really hate mealy bugs!
There are still in infancy stage (2 weeks old), just like our cabbages and lime which we grew from seeds. I shall transfer them to bigger pots once they are bigger.
Herbs Garden
I often use herbs in my cooking, be it roast chicken, spagetthi, omelette, stew beef, pie.. I love the rich, natural flavor of herbs. I have some rosemary, sweet basil and mint, they smell wonderful and is such a delightful sight. I placed them under direct sunlight and water them daily, seem to be doing well.
• Indian Borage leaves, they are natural remedy for cough. Just take few leaves and soak in hot water for about 10 minutes. That works wonder for my boy.
Transplanted them into pot and they are now growing furiously with the soil.
• Oregano grown from seeds. They need lots of sun and water. Grow baby, grow!
• Celery re-grown from our left over, looking healthy. Just chuck the cut portion in some water for about a week and you will be greeted with young shoots in just few days time. Amazingly easy...
My spring onion, leeks and shallots. All doing well and are so handy. Whenever I'm making dinner, just cut few stalks to add into my dishes. Absolutely pesticide free. Btw, did I mentioned the leeks were regrown from left over stem too?
From this - 5 cloves of garlic
To this..
And we have some red onions too...
• Indoor Garden
I reserve a small corner for indoor plants that either does not require much water (eg cactus) or can survive in water (eg pegaga & Indian borage). It's lovely to have some greens indoor and our handmade clayhouses are put to good use..
That's all about our petite garden. Hope you enjoyed the beauty as much as we do.. I shall post an update in another 6-8 weeks time when those vegetables are ready for harvest (or I hope so!)
TIPS SHARING: for growing seeding using egg tray..
• Make sure you water daily as the tray tends to absorb water. I watered mine twice a day.
• some seeds such as cucumber, okra, pumpkin and cabbage are fast to germinate - within 3 days, while some may take up to 2 weeks, such as lime, herbs, cosmos. So do not give up & discard them too quickly. Let them have the morning sun for few hours, that seems to help.
• when translating them to the pot, just tear out the egg tray and pot directly into the soil. DO NOT attempt to pull them out from the tray as the root has attached to the cardboard, you would not want to injured the roots.
• For herbs such as thyme, oregano, I would not recommend using egg tray like me, instead use a proper pot and keep them under direct sunlight (or a light source) and sufficient watering. The tray is too small for the seeding as these seeds are tiny and you tend to drop a lot in each tray. Besides putting in a planters pot allow you to move them around easily too.
Just so you know...
I must admit I am still a novice in gardening but I love greens and beautiful flowers, it thrills me to watch the flowers grow and the sea of greens bring peace to my mind. Hopefully I am doing it all correct and I can maintain my garden in current state (or better!) for the longest time possible. If you have any feedback or suggestion to improve the current setup, I would love to hear it...
Cheers,
PH