Monday, March 31, 2014

童年•爸爸 A Weekend Down Memory Lane (bi-lingual)

双语版 | Bi-lingual


爷孙俩
Grandpa & I

小时候爸爸因为赚钱鲜少在家,只有周末才难得陪家人吃顿饭。童年记忆里,爸爸从未有时间陪我玩 ,但我清楚知道他疼我,只是时间与金钱不足所以只能把照顾小孩的重担留给妈妈。我的第一套积木,第一个小钢琴,第一辆小脚踏车,都是爸爸周末回来时带给我的惊喜。虽然大部分的周末爸爸只带回几颗糖果给我,我总是期待他的归来。妈妈也是,周末的菜肴总是特别丰富。

每个星期一的清晨和爸爸道再见后,我的心总有一点戚戚的感觉,因为知道又要等到下一个周末才能再见。我还依稀记得那冷冷的空气和天空中盘旋的小麻雀叽叽喳喳的声音,天色还未亮呢。如今回想,爸爸当时也不好受吧?

今早一家人到公园野餐时,看着脚力欠佳的老爸牵着我那小瓜的手小心翼翼地提着阳伞在公园漫步,他们俩的背影带来好大的感触。小时候我曾经渴望父亲陪伴,如今我那幸福的小瓜轻易得到,而老爸也得以重拾年轻时错过的亲子机会,十分享受儿孙绕膝的时光,总是笑眯眯的看着小瓜们搞怪。

可以的话,请记得多陪伴家人。哪怕只是那一个周末,一个小时,一顿晚饭,一个问候;有心,就好。

别以为我们有用不完的明天。


When I was little, dad was the sole breadwinner in the family and he only had weekends to spend with us. He hardly had time to play with me nor bring me to park, money and time were luxury then. However I never doubted how much he loved me then, my first set of LEGO, first electronic keyboard, first little red bike... those were the surprise presents he got for me. Although most of the time he only brought me assortment of candies which he hid in his pocket, I always looked forward to his homecoming moment, so were mom, best dishes were reserved for the weekends. 

Monday morning was always a sad moment for me, waving goodbye to him knowing that we will not meet for another week. I could still vividly recall the cold morning breeze and chirping sparrows hovering in the dim lit skies. I guess it was not easy for him too to leave the comfort of home for another long exhaustive road trip.

Last Sunday morning, siblings and I arranged a family picnic at the nearby park. As we were leaving the park, my old pa held my little bunny in one hand and an umbrella on the other hand protecting her from the burning sun. He had difficulty in walking due to rheumatism and was strolling feebly on the uneven pavement, but his attention were all on the little person. 

Watching them from the back brought me into deep thought. My old pa may have missed the fun of parenting us during our growing up age, but now my little bunny had all the attention from the grandparents. I only wish that one day she would realise how lucky she was. Of course, my little Captain too.

Being a full time working parent myself without a helper, I understand that time is one essence that we never had enough. However, where chances permit do find time to spend with the family. Be it a weekend, a dinner or just a heartfelt greeting, it is the thought that matters.

One day, we may just run out of tomorrow.


Copyrights © Pui Hua and Fun With Little Ones, 2012 - present. Unauthorized use and/or duplication of any materials/photos within this website without express and written permission from this blog’s author and/or owner is strictly prohibited. Excerpts and links may be used, provided that full and clear credit is given to Pui Hua and Fun With Little Ones with appropriate and specific direction to the original content.

Saturday, March 29, 2014

{亲子篇}为妈妈们打气的一封信 A Letter for the Mom


您可是每天都给家中小瓜气得哭笑不得,感觉小瓜不断的在挑战自己的容忍度?您并不孤单,每个妈咪都有面对这样的时刻,只是处理方式各异。在此让我分享我们家的方式。

刚刚结婚时我很没耐性,和大个子往往为了小事而闹意气不说话好几天。工作上我更是个女强人般的性格,下命令的时候多过聆听。如今回想,当初的自己真的不怎么讨人欢喜,一味要当强者不甘示弱。生了孩子后,开始发觉我一定要学会处理自己那火爆的情绪。因为不希望孩子忆童年时只记得坏脾气的妈妈,我下定决心要把自己的臭脾气磨平。

于是,我从自我情绪管理开始。

刚开始,感觉自己脾气要爆发时,我会走开一阵子,尽量不让自己开口骂人。平息了后才来面对,语气也没那么重。你可有在生气时看看镜子里自己的倒影?皱着眉头板着脸,孩子看了只有哭得更大声。

翻读了好些育儿书籍后我开始自我检讨,发觉生气好多时候是因为我希望孩子跟随我意。

全职妈妈做什么都要快快快、无法忍受慢半拍。孩子一拖延、哭闹或不回复就火气开始往上升,往往为了小事令孩子难受。但要明白孩子还在学习阶段耐性真的很重要,教导小孩不同领导员工,不能设了KPI就期望他们一定会做到。反而,身为妈妈要懂得放慢脚步让孩子可以循序跟上,从中培养他们的自信。

最近上了张宝幼老师的课程后,我又有了新领悟 --用宽怀来对待是最好的方式

晚餐吃不完?没问题,肚子没饿到就好;
倒翻水或在墙壁涂鸦?别慌张, 捉着小瓜的手一起抹掉吧;
玩具丢的一间都是?甭生气, 慢慢一件件收拾就可以了。
功课做得慢? 没大事, 那就大家坐下来一起温习好了;
功课完全忘了做?真糟糕,就让老师决定处罚好了,让孩子懂得什么叫责任,别凡事都由妈妈杠上来;

真的太坏蛋时,偶尔罚他面壁思过;但如果孩子是因为被误解而发脾气,我选择不处罚,只是把他带到一旁,亲亲他抱抱他,告诉他妈妈明白他的委屈,往往孩子就会停止耍坏。真的闹得厉害时,我会忙自己的东西由得他独自哭闹,过了一阵之当他发泄够了我才伸出双手,往往他就会迫不及待地要讨抱抱。这时候我才会解释我对他刚才的态度很不满意,下次不可如此无理取闹。

孩子们闹脾气,很多时候是因为要讨父母的注意而已(也有可能是因为睡眠不足或不舒服,妈妈们要自己注意咯)。你是否因为忙着看面子书而没看到孩子要给你看的作画?或是心里头还在想着未完结的公事而没听到孩子的问候?要记得,没有孩子天生爱耍坏,可以的话孩子们都爱被人疼爱。打骂往往只把小孩的好奇心给提早熄灭,所以可免则免。

妈妈如果控制不了自己的情绪,往往会令小孩更加不安

下一次,在你为孩子的表现不满时,请先别发脾气,想想你是否也应该负起任何责任?除了打骂之外还有更好的解决方法吗?想要有个开心有上进心的孩子,就从自己身上开始。

妈妈们,给自己一个漂亮的微笑,加油!


To the non-Chinese readers, pardon me for not making English post this time, will find time for translation if possible..


Copyrights © Pui Hua and Fun With Little Ones, 2012 - present. Unauthorized use and/or duplication of any materials/photos within this website without express and written permission from this blog’s author and/or owner is strictly prohibited. Excerpts and links may be used, provided that full and clear credit is given to Pui Hua and Fun With Little Ones with appropriate and specific direction to the original content.

Friday, March 28, 2014

{Handmade} My Weekend Hobo Bag


Finally I've made another new bag for myself, this time it's a slouchy hobo bag that is ideal for weekend used. Just chuck anything and everything in there and we are ready to go!


It's really really spacious in there... 

I got this elegantly beautiful thick cotton fabric as a gift, I love the pastel green floral prints which gives a hint of summer. Pair with a plain white webbing for the shoulder straps, a hidden pocket and a long 22" zipper, this bag is pretty easy to make and I love the casual trendy feel it brings.. As if I'm going to the beach or going window shopping with my girl friends.

Never will forget to add my personal label.. 

What's a hobo bag? It refers to bag design that resembles a crescent shape (just like the one above). It's typically made of soft material with shoulder straps. Personally I really like this design a lot as it's flexible and cuddly. 

Guess I'm going to make another medium size one that is suitable for office use... For now, it's time to go out and show off. :)


Interested to make one for yourself too? Hop over to Flamingo Toes now for her super simple tutorial.. 


Copyrights © Pui Hua and Fun With Little Ones, 2012 - present. Unauthorized use and/or duplication of any materials/photos within this website without express and written permission from this blog’s author and/or owner is strictly prohibited. Excerpts and links may be used, provided that full and clear credit is given to Pui Hua and Fun With Little Ones with appropriate and specific direction to the original content.

Tuesday, March 25, 2014

{Mini Tutorial} The Making of Princess Elsa Dress

As promise, I am now sharing the pictorial process on the making of the Frozen inspired Princess Elsa dress, it is not a full tutorial but may give you an ideal how the dress is assembled. These steps may be useful reference if you intend to make one for your little precious too. 

No pattern available for download as I drafted it using one of her ready-made dresses. In total it took me about 3+ hours to complete the whole dress, not a very difficult piece but would require some basic in sewing and handling tulle fabric, which is not so forgiving on stitching mistakes.


The materials needed:
  • 1 1/2 yard of satin fabric (for bodice & skirt)
  • 1/2 yard of lining cotton fabric (for bodice)
  • 2 yard of tulle fabric (for skirt)
  • 3 matching buttons 
  • 2 2" thin elastic
  • Sewing machine and matching threads
Note: all measurement is based on closest approximate as I was using leftover fabric without measuring.


The Making

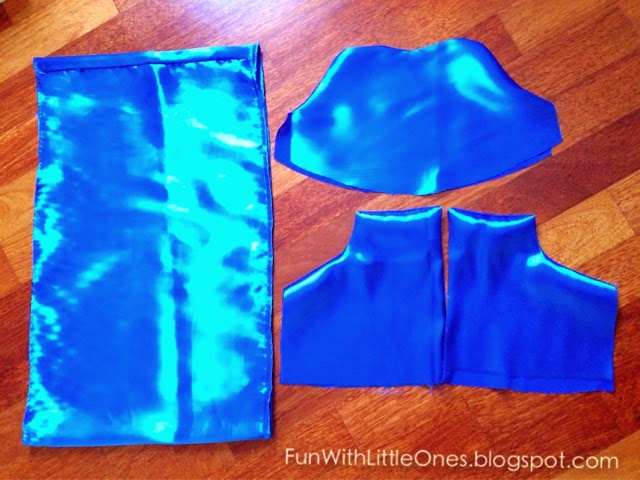
1. First, cut all the pieces:
• 1 set front bodice (satin & lining fabric) - refer 1
• 2 sets back bodice (satin & lining fabric) - refer 2
• 1 set skirt (satin & tulle fabric, lining not required) - refer 3a & 3b


2. The sew the top bodice pieces with the lining; sew the tulle fabric onto the skirt using the longest stitching length (you may want to check your machine's manual), then pull both ends of the thread to gather the skirts. 

To create ruffle effect for the tulle skirt, remember to cut the skirt fabric at least 50% longer than the bodice. Hence the ratio of bodice to tulle skirt should be 1:1.5. 


3. Press all the pieces with warm iron (this is one important step not to be missed!).


4. Attach the front & back bodice on the side, with right sides facing. Sew and serge around the raw edges.


5. Using fabric pins, attach the tulle & skirt to the bodice, again with right side facing. Serge around the raw edge to avoid fray.  

If you are uncertain how to make this step, don't worry.. Ashley from Make it & Love It have a great tutorial on how to make and attach gathered/ruffled fabric


6. Now the skirt is 80% done. Attach 2 rectangular tulle as shoulder straps. You may want to try it onto your girl at this stage to ensure its of the right length.

7. For the cape, I just used 1/2 yard of tulle fabric, serge the edges and attach the elastic loops on top corners to form a "U" shape, so it can easily hook onto a button. 

8. Add on the embellishments, the buttons and ta-da... we are done! 

I made the covered fabric button using the toolkit bought from Daiso, it's really easy to use. You can check out the previous post here.


This picture basically sums it all.


The simple, elegant Princess Elsa dress for the little girls we love. Please please do share if you have make a similar dress too.. I would love to hear from you! ;)


Just a Tip..
When ironing the satin fabric, I would recommend you to iron it from the reverse side (non shiny) to avoid risk of leaving a burnt mark on the fabric.


Copyrights © Pui Hua and Fun With Little Ones, 2012 - present. Unauthorized use and/or duplication of any materials/photos within this website without express and written permission from this blog’s author and/or owner is strictly prohibited. Excerpts and links may be used, provided that full and clear credit is given to Pui Hua and Fun With Little Ones with appropriate and specific direction to the original content.

Sunday, March 23, 2014

{Handmade} Princess Elsa Dress, Frozen Inspired!


My duo have been obsessed with songs from Frozen recently, every night they insist to watch at least 1 round of the video clip before going to bed. The song Let It Go and Do You Want to Build a Snowman just kept playing in my mind over and over again even while I am driving.

Since my little girl is so much in love with the song, I thought I could surprise her by making her a Princess Elsa dress. It's not exactly the same, I made some modifications to suit our weather but most of the elements remain, especially  the cape which I think is a must. 


Love how it floats in the air. 


It's a bit loose on her but fret not! I can fix that anytime with my trustworthy machine. 

It's a different shade of blue from the actual Elsa dress which is of turquoise blue, but I think it looks really nice nonetheless. *pardon me but I'm just happy*

The dress in making...   


I added some embellishment to give it snowflakes like effect. Love the deep sparkly blue.


A custom made button to ensure it blends in nicely with the outfit. This is the second time I made my own button, the first time was for the Little Red dress I made for her during CNY.


The step-by-step making will be made available soon, bear in mind it will not be a tutorial but just the pictorial process of making this Disney princess dress which you can used as reference.

My little girl is having her nap now, can't wait to surprise her when she wakes up! *Pray hard that she likes it!*


Update!!

She wore the dress to the playground and she sure was happy and proudly running around while attracting all the stares, especially from other little girls.


Love how she walked with such confident, I have challenge capturing a clear image of her as she was constantly running... my mighty girl.


And here is the source of my inspiration, just in case you were wondering who is Princess Elsa (which I really doubt so...)


Stay tuned for the making. ;)
The tutorial is done! Go ahead and check it out here... :)


Copyrights © Pui Hua and Fun With Little Ones, 2012 - present. Unauthorized use and/or duplication of any materials/photos within this website without express and written permission from this blog’s author and/or owner is strictly prohibited. Excerpts and links may be used, provided that full and clear credit is given to Pui Hua and Fun With Little Ones with appropriate and specific direction to the original content.