Sunday, May 24, 2015

{Book Review} The Gruffalo.. best read-aloud book!


We have got the Gruffalo and the Gruffalo's Child books since 2 years back, their uncle residing in overseas got them as Christmas gifts. I did not thought about writing a review as I thought the Gruffalo is so popular that it needs no introduction, most children shall have read it, or watched it as it has its own TV show and theater performance.

But, having been reading these 2 books over and over again for the past 1 week (see note below), and I thoroughly enjoy reading these books with them. I personally find they are the best read aloud picture book that I have came across so far!
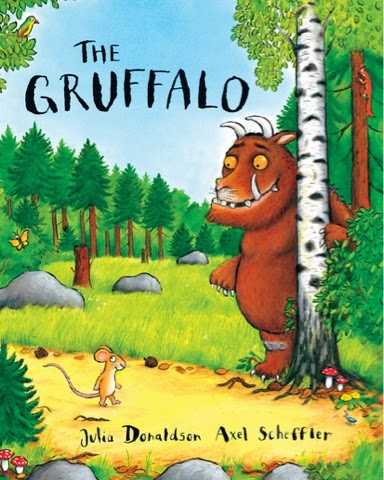
The Gruffalo
Story by Julia Donaldson. Illustration by Axel Scherffler


The Gruffalo's Child
Story by Julia Donaldson. Illustration by Axel Scherffler


What do WE like about the Gruffalo?

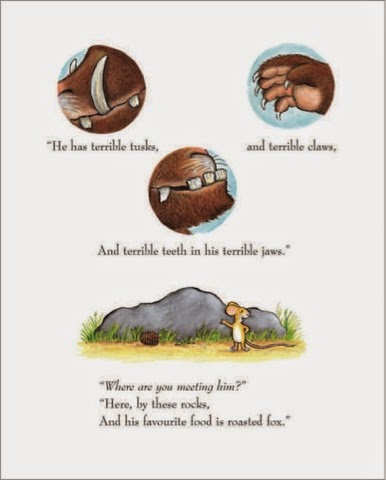
• The story rhyme. How lovely they rhyme and my kids loved it whenever I read text like scrambled snake, Gruffalo crumbs in a spooky tone, they always giggle and nowadays they read along. For example, the opening paragraph goes like this..

"The mouse room a stroll in the deep dark wood,
A fox saw the mouse and the mouse looked good."


• The story is smart & wicked (in a fun way). It's about how a small little mouse managed to leverage on others' strength to escape being eaten by the many predators it met. He cleverly used the Graffulo to scare off the fox, the owl and the snake and at the same time making the Graffulo think these predators are actually scared of him, the Big Bad Mouse. 

Little kids can certainly relate themselves to the little mouse (small & tiny compared to others) but they don't necessarily have to be weak & be bullied, not if they think smart. While many children books teach about mannerism and general knowledge,this is really about adaptive problem solving, in my humble opinion. 

Who would have guess an humongous monster would be scared of a tiny mouse that it could easily crushed with a single step? ;)

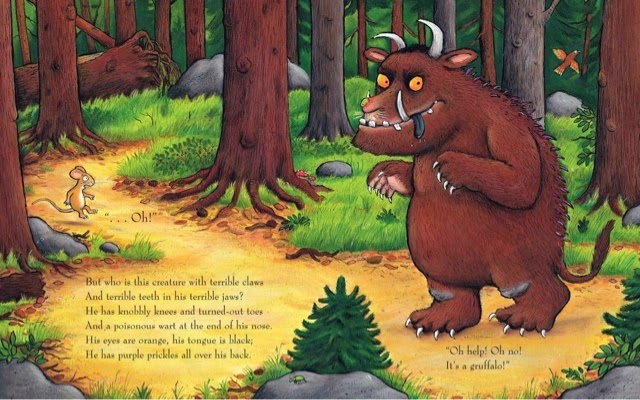
Beautiful illustration. All 32 pages are graphically illustrated with great details, i especially love the full 2 page of the deep dark wood, with butterflies, ants, mushrooms, squirrels, fallen trunk, pine cones... Reminded me of our peaceful walk in the NZ's wood. 

Even my girl loves the prints.


If your child or nephew or niece or grandchild is between 3 to 7 and enjoys reading, I would HIGHLY RECOMMEND getting this book for him or her. Beginner reader may think it is too wordy at first (totally fine with more advanced readers), but read aloud to them and you may see the interest shift eventually. If they like the first Graffalo book, then most certainly they will enjoy reading the second book, the Gruffalo's Child too. 

If you are really interested to find out more or get some Gruffalo's merchandiser DVDs, you may want to visit the Gruffalo's official site here!

E reading to his little sister.. 


Note:
I have been practising a Book Week with the duo as we all love books. Every week we will pick 3-5 books to be covered for that week's bedtime story, I find that this way allows the stories to leave a stronger impression in their mind & also keep them excited when there is a new rotation. I usually purchase the books in bulk so we habe quite a number of books available for rotation. :)


Where to buy?
Read the review or purchase direct here:


Reference:
Pictures included here are abstracted a from the following sites:
- the Guardian UK, they have an article on Julia Donaldson
-the Scholastic


Stay Calm 
& 
Read On


Copyrights © Pui Hua and Fun With Little Ones, 2012 - present. Unauthorized use and/or duplication of any materials/photos within this website without express and written permission from this blog’s author and/or owner is strictly prohibited. Excerpts and links may be used, provided that full and clear credit is given to Pui Hua and Fun With Little Ones with appropriate and specific direction to the original content.

Saturday, May 23, 2015

Clay Art Project with the Kids, Part 2


Finally, we are done with the clay art project.... (You may refer to part one on how we made the clay pieces hereWell, only some of them are done, but I can't wait to share as the remaining will have to wait till next weekend.

We applied multiple layers of acrylic colors directly onto the clay arts, diluted with a little bit of water. Started with plain color as the base, then slowly apply the different shade of green / red / brown. I let them apply the base coat while I elaborate with more details. What I learnt in my art class when I was 11 came really handy, not bad huh.


A little tree.

The little pea pod, I made this on my little boy's request and its actually my favorite among all.


Strawberries with different shaping technique. I like the first one better where I made the berry and leaf separately.


The acrylic paint we used for this project (this is a beginner set), got them from Popular book store but you can always get them from art supplies shop such as Art Friends, Spotlight or any major stationary shops. 

Acrylic dries up pretty quickly so you may want to squirt only a small amount each time so you don't have to waste them.

I worked on my cake runner, I find that this way allow me to manage easier without getting my fingers too messy (I put a layer of paper over the cake runner so it's easier to cleanup).

That's it, our easy peasy weekend art & craft lesson at home, and the kids are begging me to do this again next week. :)


Keep calm, and craft on


Copyrights © Pui Hua and Fun With Little Ones, 2012 - present. Unauthorized use and/or duplication of any materials/photos within this website without express and written permission from this blog’s author and/or owner is strictly prohibited. Excerpts and links may be used, provided that full and clear credit is given to Pui Hua and Fun With Little Ones with appropriate and specific direction to the original content.

Clay Art Project with the Kids, Part 1


Big Guy came home with a packet of white clay and modeling tool. Yeah, time to get creative! Since its white clay, we decided to mold them first before painting them (I have a box of acrylic paint that had been waiting to be summoned...)

The next morning, after we had our simple breakie the duo just could not wait to get started on their clay craft project, the opened the packet of clay right away! So the 4 of us (daddy could not resist the fun too!) spent the next hour molding, rolling and shaping... and look what we came out with!


Little E designed a dice, sword, yatch and a leaf; he also made a hut after seeing mine, love the little "buttons" he added onto his little hut.

Zoom in on the dice. 

I designed the huts and little pea...

Some strawberries too. Hopefully they turn out nicer after coloring.

Big Guy was more artsy than any of us.. A lone man.

Little C was a little... undecided. She was busy, no doubt, very busy working along side us, but in the end she seemed to enjoy cutting more than moulding... LOL. Anyway, we thought that it's alright, as long as she enjoyed and we all had some jolly good time together.


We left the completed clay pieces in the oven on high heat (220°c) for about 30 minutes until they are all dried. Coloring shall begin the next day...

Clay project is really simple, all you need is some clay (obviously! You can buy the colored ones too from stationery shop) and some modeling tools. No special cleaning tool required, just water and soap will do.

So go on, have fun with your little ones!

Stay tuned for the next post on the colored projects... ;)

Updated, here comes Part 2!


Copyrights © Pui Hua and Fun With Little Ones, 2012 - present. Unauthorized use and/or duplication of any materials/photos within this website without express and written permission from this blog’s author and/or owner is strictly prohibited. Excerpts and links may be used, provided that full and clear credit is given to Pui Hua and Fun With Little Ones with appropriate and specific direction to the original content.

Saturday, May 2, 2015

{Tutorial} DIY Fabric Pencil Pouch


Little E is in his final of preschool now before he enters the primary one, which signals the beginning of formal education. I decided to make him a fun pencil pouch before things get formal.

So here it is, a really simple 1 hour pencil pouch with a wide opening that allows it to fit almost every bring. Pencils, sharpener, erasers, rulers, scissors, glue stick.... I picked these little sleepy owl fabric among the box of fabric scraps.


Added a handy handle. 

Also an internal pocket for keeping his notes (somehow he likes to write secret notes and keep inside his pencil case, so I thought this comes handy)

My handsome absolutely loving his new pencil case, loaded with all his stuff right away and ran off to show off to his daddy. Easily pleased, he is. :)

 
Interested to make one? Here's a simple tutorial.


The Making:

1. Begin with fabric selection. You just need:
• a piece of cute cotton fabric
• a backing cotton (in dark color preferred)
• a piece of batting for bag and
• a good quality zip, approx 18cm.

Fabric Measurement is approximately 16cm x 16cm, you can vary according to your preferred size. 

2. Iron the batting onto the wrong size of the top fabric until it glued on tightly, then sew all 3 pieces together to hold them in place (see pic below)

Using a small rectangular fabric, sew into a 10cm long piping to be used as side handle.

3. If you would like to add an internal pocket, sew it on with a straight line in the middle, as per the red dotted line indicated below. (DO NOT ATTACH handle at this stage, I made a mistake)

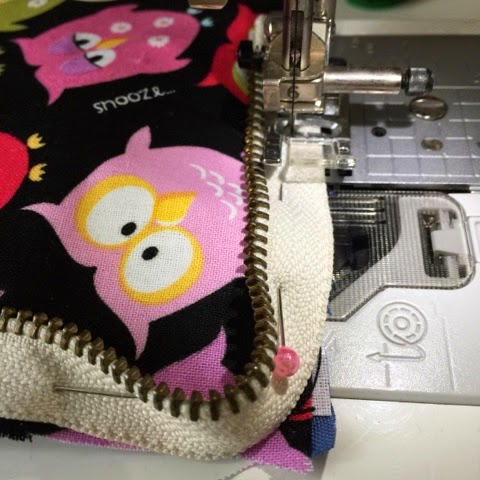
4. Time to attach the zip. Keep the zip UNZIPPED, then pin it onto both side of the fabric opening. Right side of the zip shall be facing the right size of the top fabric.


5. Now, sew along the edge carefully on the inner size (wrong side) of the fabric.

6. Turn the almost done pouch to the right side, now change the pressie foot to a Zipper foot and sew it as close as possible to the edge of the zip.

7. That's it, your pouch is done. Just hem the seams with zigzag stitches or binding tape for a neat finishing.

Finally, don't forget to spray a thin layer of fabric protector on the exterior and interior of the newly completed pencil pouch to prevent dust and dirt. Start loading it up right away with all your stationery (or why not make up pencils and brushes? ;)  


The making in one picture:


Easy peasy weekend project!


Copyrights © Pui Hua and Fun With Little Ones, 2012 - present. Unauthorized use and/or duplication of any materials/photos within this website without express and written permission from this blog’s author and/or owner is strictly prohibited. Excerpts and links may be used, provided that full and clear credit is given to Pui Hua and Fun With Little Ones with appropriate and specific direction to the original content.