Love. Laugh. Learn. A fun journey with Little Ones. A beautiful life with Loved Ones. A crafty mind to inspire my Young Ones.
Friday, November 30, 2012
Christmas oh Christmas! 圣诞节快来咯
*updated*
December is finally here, Christmas is only 23 days away, yay!
This is always the favorite month for me, it's the time when hub and I will take time off from work, setup Christmas tree together, wrapping & unwrapping presents and good friends & family get together.
Despite I may have to cancel my year end break due to work, I'm determined not to let that ruin my mood... *fingers crossed*
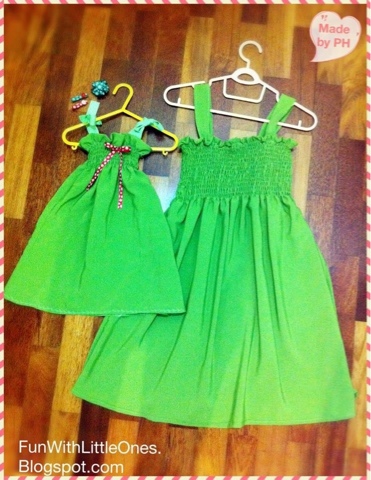
Well, since I was in such a joyous mood, I made a Christmas dress and accessories for my baby Claire. The snowflakes ribbon certainly adds on the festive feel. It took me awhile to source for the Snowflake ribbons, but I think the effort is worth it..
Here's a closer view of the ribbon.
I used leafy pattern for the edges to compliment the Christmas theme..
I made a matching smocking dress for myself, now we have a complete mommy-daughter set, she will definitely looks like mini-me now... *evil smil*
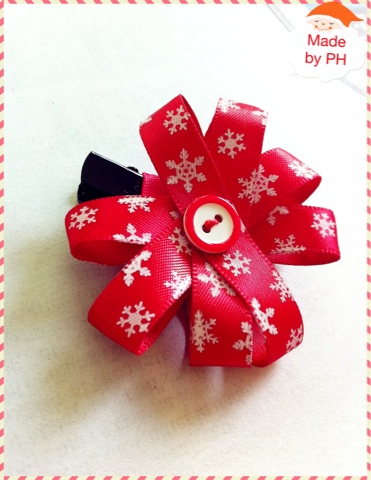
Snowflake flower hair clip in red. Now she has a full Christmas set :)
Baby Claire looking sweet in her new hair clip, she actually went in front of the mirror to admire her new accessory. No joke, and she's only 1 year old!
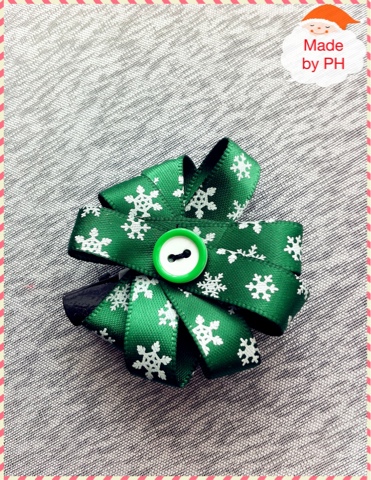
Snowflake flower hair clip in Christmas green.
Here is a simpler design with rose snowflake hair clip
Ok, this is just the beginning, more to come as I want to make something special for my little handsome too...
Till that happen, happy December!
Copyrights © Pui Hua and Fun With Little Ones, 2012 - present. Unauthorized use and/or duplication of any materials/photos within this website without express and written permission from this blog’s author and/or owner is strictly prohibited. Excerpts and links may be used, provided that full and clear credit is given to Pui Hua and Fun With Little Ones with appropriate and specific direction to the original content.
Tuesday, November 27, 2012
Smocking Dolly Dress, again!
*Updated*
A good friend of mine was back from oversea for a short visit with her little girl. The daughter is about same age as my baby Claire, so I thought of making her a new dress as her coming birthday present, which I won't be around to celebrate with her.
Since I only have less than 2 hours before I have meeting up with them (it was a really last minute decision), I though to make the smocking dress again using the polkadot fabric I had.
Isn't it lovely? Polkadot looks good only any baby girl, anytime! :)

Here's a close up on the smoking effect and the simple shoulder strap which was made of soft plain grosgrain ribbon.

Simple curvy pattern for the hem.
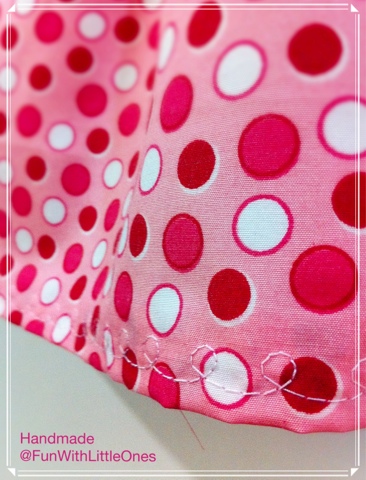
I am planning to make a similar dress for my baby, perhaps with added front pockets for a more playful feel. Stay tune for the picture upload (unfortunately, I only have time for sewing on weekends or my off days).
Interested to make one your little one or yourself? Check out my previous post on the first smocking dress I made last week. Click here for the link.
I really like this print, it looks sweet on baby even with really simple design. Check out here for a peek at the simple top I made for my girl few months back.
Oh, and did I mentioned this dress is completed within an hour? Smocking can be challenging for first timer but once you've learnt it, it's an useful skill that can be applied to so many designs. So, what are you waiting for? let's get started. ;)
An Enhanced Version...
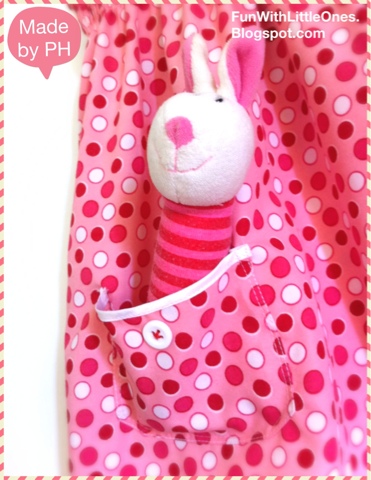
I made a similar dress for baby Claire a week later, this time with an added pocket in front, isn't it looking sweet? perhaps I'll add a little red ribbon later.
Copyrights © Pui Hua and Fun With Little Ones, 2012 - present. Unauthorized use and/or duplication of any materials/photos within this website without express and written permission from this blog’s author and/or owner is strictly prohibited. Excerpts and links may be used, provided that full and clear credit is given to Pui Hua and Fun With Little Ones with appropriate and specific direction to the original content.
Wednesday, November 21, 2012
Smocking Dolly Dress for Little Girl
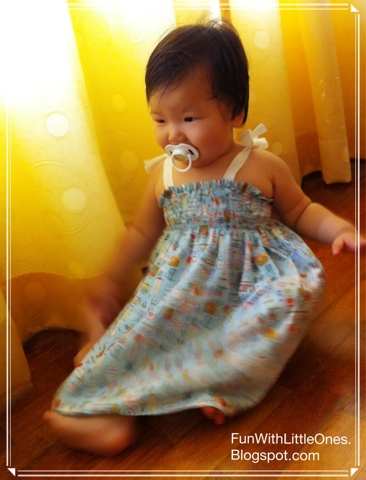
Yes, another new dress for my little Claire is done! This time I tried a new technique that I had always wanted to learn - smocking the fabric for easy wearing and comfortable fitting (also known as "shirring").
Doesn't she looks adorably dolly in her new dress? :)
Admiring at her own mirror reflection :)
One main reason that I like smocking dress is that - no buttons nor zip required! so the dress can easily fit onto little one even if she puts on weight or shrinks slightly.. Pretty cool isn't it? ;)
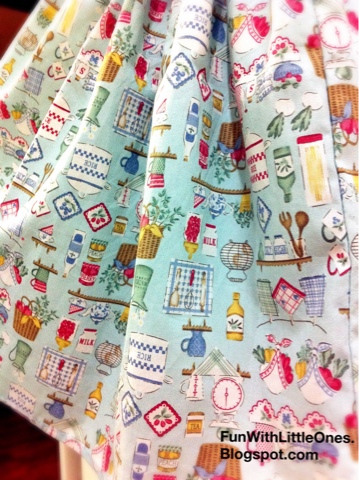
Here's a close up on the smoking effect. It creates a beautiful wave on the lower bodice too.
I like this fabric, it gives a homey feeling with all the kitchen utensils. I bought it few months back but was not sure what to make of it, i'm glad I finally find a design that fits its paster blue print.
Here's the front view of the dress (in fact, front and back are the same :), simple but sweet.
Interested to make one your little one or yourself? Smocking can be quite a challenge for beginner, so I've compiled some tutorials here for any dare-taker :)
What you would need:
Reference Links:
Pictorial guide on making the smocking dress is available on www.makeit-loveit.com. The most helpful I've found so far.
http://www.makeit-loveit.com/2011/11/sewing-tip-shirringsmocking-with-elastic-thread.html
If you are having a Brother sewing machine, you probably will need this troubleshooting guide if somehow smocking doesn't works on yours.
Thanks for reading, till the next post, happy crafting!
Fun With Little Ones with appropriate and specific direction to the original content.
Sunday, November 18, 2012
Baby Claire's 1st Birthday Party!
We had an early celebration for baby Claire's first birthday, yes, she's turning 1 and I just couldn't help to feel that the time had passed so fast. I can still vividly recall those midnight breastfeeding moments and now she is already so strong and learning to walk about on her own.
Anyway, after long preparation I'm so glad that everything went smoothly and everyone had fun at the party, especially my duo and the grandparents. Things went as planned and it seems like my little masterplan worked well. :)
This is the flora theme birthday cake I baked for my little sweetie pie, orange chocolate cake with sweet flowers decoration.
 |
| Birthday Cake in Pink Flora Theme |
 |
| With a big number "1" candle! |
First time ever I made a fondant cake of this size, glad it turned out alright and was well received by the guests. My little boy actually asked for a second slice, which means he liked it, yay!
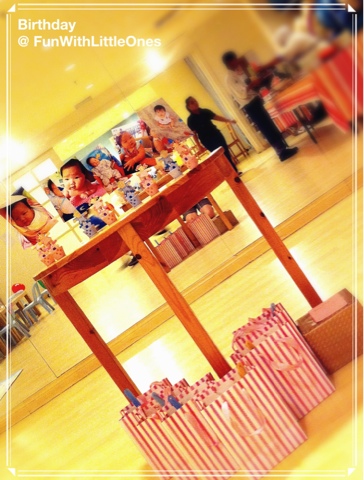
The place was all setup the day before. Just simple decoration to brighten the place. We stick to the baby blue and soft pink theme. Too much colors will look cluttered.
 |
| The kids table, where the finger food will be served. |
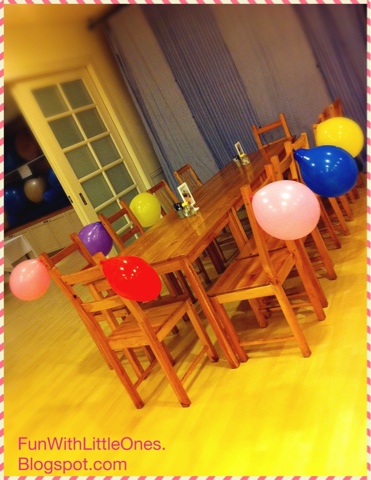 |
| The adult' table. More balloons for the kids to grab and play :) |
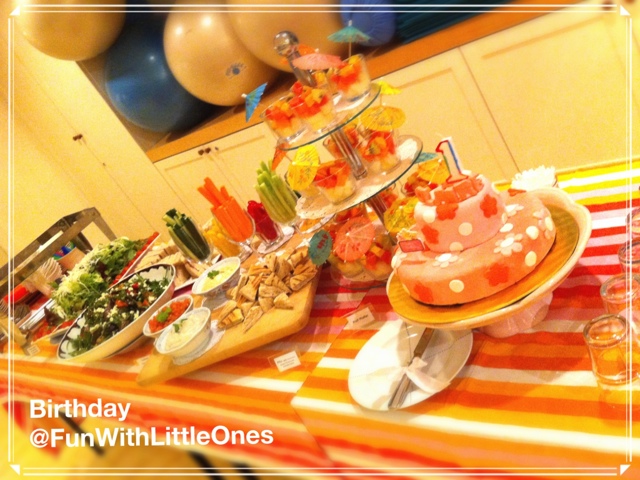 |
| Healthy food for everyone.. big and small alike |
These are some finger foods I prepared for the little guests - wholemeal cherrios, marshmallows and home-baked cheese crackers. I served them in little cupcake holders for easy eating and disposal.
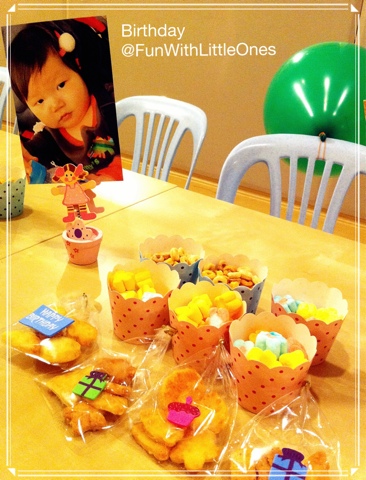 |
| Finger food for little guests |
I setup a mini photo gallery for baby Claire.. Showing her progress from a newborn baby to a cute little angel girl who loves to laugh and play. Noticed those little pegs? Aren't they lovely..
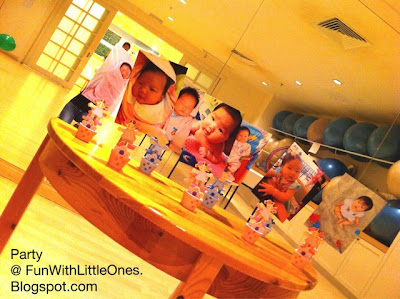 |
| Mini Photo Gallery |
The party bags are in the same theme too.. waiting for their little owners.
Baby Claire and Little Ethan thoroughly enjoyed themselves with the balloons and companion of the little guests.
Isn't she looking lovely in her mommy-made birthday dress and princess crown? :)
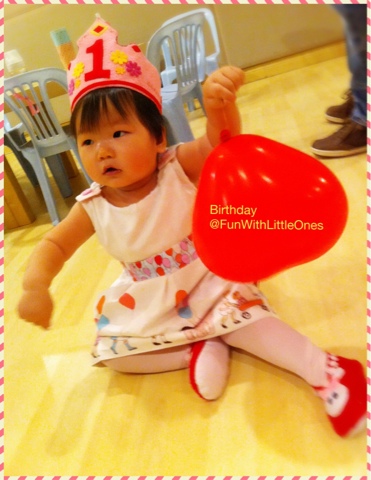 |
| My little Princess Claire. Head-to-toe, all made by mommy |
Hanging out with little frien.
 |
| Princess Claire and pretty Esther |
For the convenience of everyone, we had the party at a baby friendly cafe, the staffs were friendly and the charge is consider reasonable with the facility and services provided - they let us host the party in their yoga studio with full ceiling height mirrors and wooden flooring, so the kids can really run around and enjoy all their heart out. We will definitely consider this place again if we are having the next birthday party.
To sum up, it was a good day for my little precious and the little guests, and I'm sure the adults enjoyed chit chatting among themselves too, myself included :)
That's all about the birthday party... thanks for stopping by!
Interested with the recipes for the food above?
Copyrights © Pui Hua and Fun With Little Ones, 2012 - present. Unauthorized use and/or duplication of any materials/photos within this website without express and written permission from this blog’s author and/or owner is strictly prohibited. Excerpts and links may be used, provided that full and clear credit is given to Pui Hua and Fun With Little Ones with appropriate and specific direction to the original content.
Saturday, November 10, 2012
Kid's Room: Simple Decoration Ideas
As Ethan passed 3 years old, I though to give more personality to his room and let him feel the sense of ownership, hoping this will encourage him to feel comfortable to sleep on his own bed in his own room.
After some dressing up of his room recently, he is really proud of his own space and at times he will invite me to sleep in his room with him. Although he still prefer to squeez onto our bed most of the time, he enjoys his room too and I'm sure soon he will have no problem to sleep alone.
Here's what I have done.
A wall that is dedicated to be "Ethan's Wall" where I stick some of his artwork and paintings using a tack-it sticker that can be easily removed without damaging the paint. These are artworks from his preschool or during our private playtimes. He is really proud of this Ethan's wall and always show it to friends and relatives who come to visit :)
* those robot and spaceship stickers are wallpapers which I stick around the entire room.
A stick on label with his name and stick onto the door. It's the most effective way to mark the territory for any boy (or should I say, male :))
Since the wall is full, I hang some of his artworks and soft toys up on the ceiling - using 4 strings of lanyards (I got lots of these from exhibitions and seminars I attended in the past) and clip the onto the curtain rails. No tapes, no nails, totally cost free and easily changeable... Baby Claire loves looking up whenever she sleeps in the room.
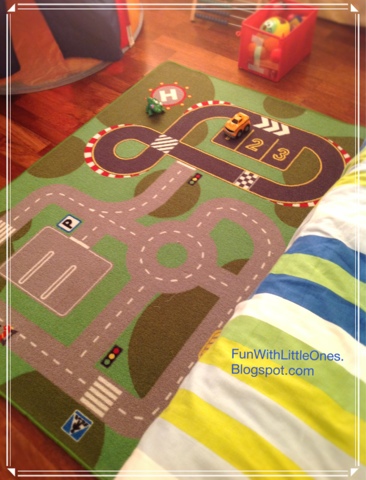
A play mat right next to his bed with a box of toys and some books (I have yet to get an ideal book shelve) to keep him occupied when he's alone in the room. Most boys love cars and he has lots of them, so having a track mat is just ideal for him. I got this piece and the toy box from IKEA.
Next I'm going to stick some glow-in-the-dark plastic stars onto the ceiling to make bedtime more enjoyable..
And one last thing I'm working on is personalized pirate theme bedding for him - pillows, quilts, bedsheets, bolster... Currently he has a really cute and colorful animal print comforter which he quite likes, however having something made by mommy actually makes him feel proud and special.
These are just some of the inexpensive decorations that I have done for my little boy, please do share your idea / feedback as I really enjoy decorating his room .. :)
Copyrights © Pui Hua and Fun With Little Ones, 2012 - present. Unauthorized use and/or duplication of any materials/photos within this website without express and written permission from this blog’s author and/or owner is strictly prohibited. Excerpts and links may be used, provided that full and clear credit is given to Pui Hua and Fun With Little Ones with appropriate and specific direction to the original content.
Friday, November 9, 2012
Coming Soon - Baby Claire's 1st Birthday (Part 2)
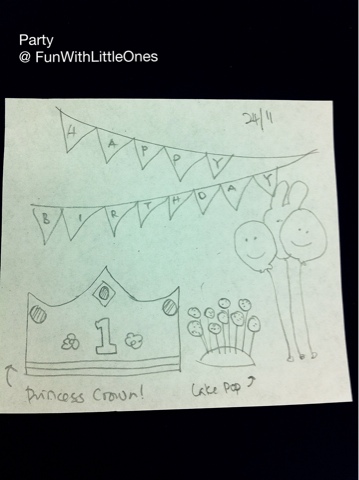
Following the completion of Baby Claire's birthday dresses, I have made her a crown so she will be princess for a day. You may refer to Part 1 posting here on my master plan the dresses I had made for her.
The crown is made out of felt with a velcro for easy strap on, embroidered with her name on both sides. I have yet to try it out on her as I made this at night while she was asleep, I am just hoping that it will not be too warm under our hot weather. *praying*
Here is the plan I have, again, sketched on a piece of scrap paper :)
I have also made a visit to a local art and craft shop to get the party supplies needed for the party, Art Friend @ Mid Valley. It is probably the largest art supplies store in town, the next best option apart from online order. I have been scratching my head for activities to do with the kids, and I was so glad to find these finger painting pens which can be used for face painting with the kiddos during the party, I'm sure they will loved it! (I still like it as an adult now :)
It is really fun to see everything falling into place as they intended to be. Perhaps working in corporate for too long, I love things to be in order, on schedule and on budget. So far, I am doing good according to my own expectation (or so I think :))
I have captured the picture of the making of this felt crown, however in a lazy mood to post it up. So please do bear with me until I find the time and umph to blog about it... Till then,thanks for stopping by!
Copyrights © Pui Hua and Fun With Little Ones, 2012 - present. Unauthorized use and/or duplication of any materials/photos within this website without express and written permission from this blog’s author and/or owner is strictly prohibited. Excerpts and links may be used, provided that full and clear credit is given to Pui Hua and Fun With Little Ones with appropriate and specific direction to the original content.
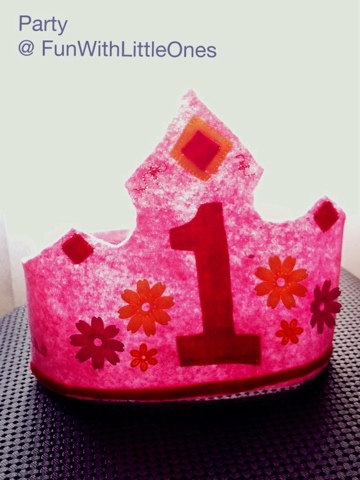 |
| Birthday Princess Crown for my baby girl |
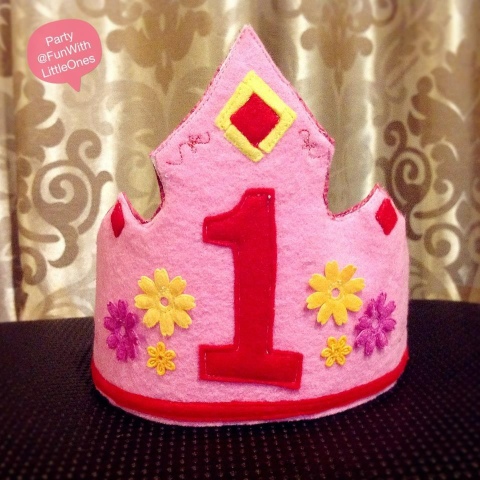 |
| Birthday Princess Crown for my baby girl |
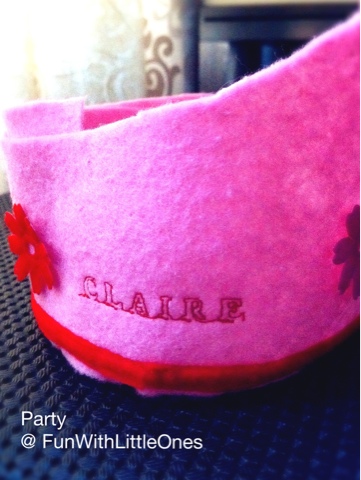 |
| Embroidered with her name |
Here is the plan I have, again, sketched on a piece of scrap paper :)
I have also made a visit to a local art and craft shop to get the party supplies needed for the party, Art Friend @ Mid Valley. It is probably the largest art supplies store in town, the next best option apart from online order. I have been scratching my head for activities to do with the kids, and I was so glad to find these finger painting pens which can be used for face painting with the kiddos during the party, I'm sure they will loved it! (I still like it as an adult now :)
It is really fun to see everything falling into place as they intended to be. Perhaps working in corporate for too long, I love things to be in order, on schedule and on budget. So far, I am doing good according to my own expectation (or so I think :))
I have captured the picture of the making of this felt crown, however in a lazy mood to post it up. So please do bear with me until I find the time and umph to blog about it... Till then,thanks for stopping by!
Copyrights © Pui Hua and Fun With Little Ones, 2012 - present. Unauthorized use and/or duplication of any materials/photos within this website without express and written permission from this blog’s author and/or owner is strictly prohibited. Excerpts and links may be used, provided that full and clear credit is given to Pui Hua and Fun With Little Ones with appropriate and specific direction to the original content.
Sail the Sea Bedding for Little Captain (It's Peter Pan!)
When I was a kid, Peter Pan was one of the stories that I really liked. The lovely Tinker Bell fairy, the Neverland where you forever stay as a kid, the naughty captain Hook, the tick-tocking crocodile who swallowed a clock, and most importantly, little Peter Pan who will never grow old. I once dreamt of a flying pirate ship that took me sailed through the starry night sky.
Those were memory of long ago.
However, thanks to the recent Disney cartoon series, Jack and the Neverland Pirates, my little boy too developed fond interest in pirate and pixie dust, so I decided to make him a "Sail the Sea" bedding set to make bedtime more fun.
I have consciously looked out for sailing and pirate fabrics, after having collected what I needed, I started making the pillows, the quilt... And hopefully next is the bed sheet.
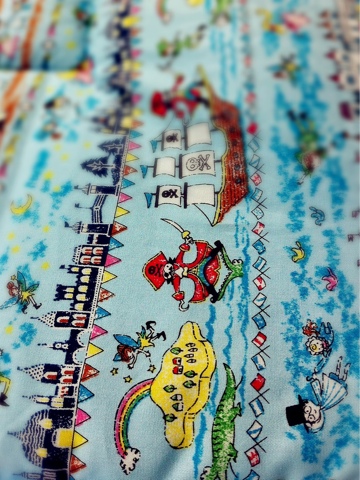
So here it is, the Sailing theme Bedding for my little Captain Ethan. For the comforter, I used different prints for both sides.
Top Print: Peter Pan & Captain Hook
Naughty captain Hook and the crocodile :)
Captain Hook vs Peter Pan!
The happy children...
Reverse Print: Pirate Ship Sails the Sea.
The front and back prints... Love them both :)
I referred to this tutorial by flosieteacakes on quilt making, however I simplified many of the steps as I used single piece of fabric instead of patch work, so it only took me about 2 hours to complete this piece. I used a total of 2 yard fabrics with cotton batting as insert. It's washable and definitely can last my little ones for several more years :)
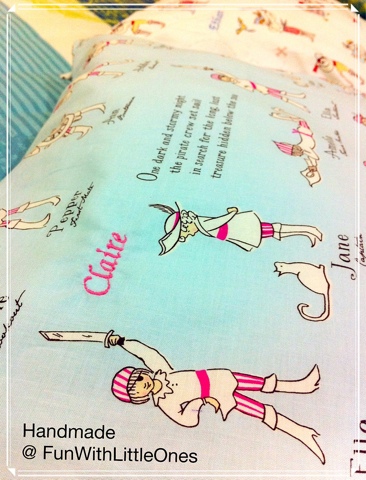
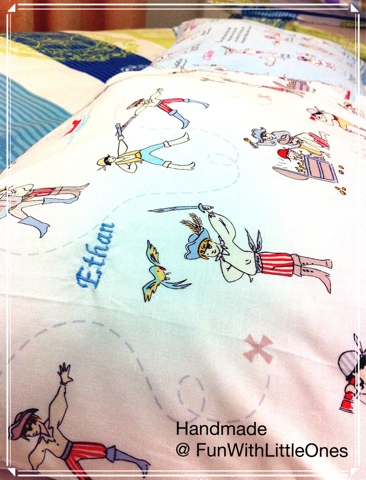
The pirate themed pillows for my happy duo..
For Baby Claire...
For Captain Ethan..
I am in love with this bedding set, so is Ethan. When I showed him his new pillow and quilt the next morning (I do all my sewing at night), he was so happy and told me he loved them while wrapping himself with the new quilt. Instantly he pushed his old pillow and quilt aside. :)
It's such a wonderful feeling to see my little boy exploring his pillow (tracing the lines to search for the buried treasure), or searching for Peter Pan / Captain Hook on the comforter, hunting down the little crocodile during bedtime; bedtime is so fun and warm.
Peter Pan was one of my favorite childhood characters, by making this bedding set for my little boy who shared the same liking, it felt as if I have revived my childhood dream. *ready to enter into dream land...*
Interested to make one yourself?
I am using the Out To Sea fabric by Sarah Jane, she has the full range of themed textile that you can choose from and lots of her design to inspire you. As for the Peter Pan fabric, unfortunately the store that I bought from is already out of stock, so I am not sure where to source for it now... Have fun & if you ever made a bedding set similar to this for your little ones, feel free to share ya, it's wonderful to see other's loving craft! :)
Copyrights © Pui Hua and Fun With Little Ones, 2012 - present. Unauthorized use and/or duplication of any materials/photos within this website without express and written permission from this blog’s author and/or owner is strictly prohibited. Excerpts and links may be used, provided that full and clear credit is given to Pui Hua and Fun With Little Ones with appropriate and specific direction to the original content.
Subscribe to:
Posts (Atom)


