Saturday, October 27, 2012

Necktie for Little Boy 小男孩领带


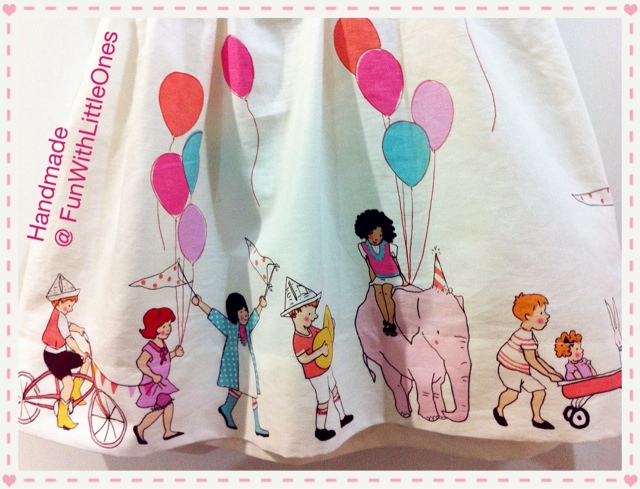
I really adore the Children on Parade fabric I used for making baby Claire's birthday dress that I decided to make a necktie for my little boy.

After doing my research for some times, I've finally decided on a suitable design that is easy to fit on - I used pin on instead of an actual tie-on or strap-on necktie.

So here it is, the special made necktie for my darling boy - a little boy riding on bicycle.


He was so excited when I told him I'm making him a necktie like daddy's, he actually accompanied me throughout the making. So not surprising to me that he really loved his special tie as he somewhat participated in the process of making. :)

Isn't him looking handsome? *I'm obviously in admiring mood*


He must have really liked this necktie that he agreed to pose for me in such a jolly mood.


Half way making only I realized I forgot to take pictures, so this is only the second half of the supposingly tie making tutorial.


Now I don't have to pay for pricey yet boring looking boy tie anymore, yay!


Note:
If I can find a clip-on would be more ideal, so do drop me a message if you know where in town / online I can find a clip on pin (like those clip on earrings). Thanks in advanced!


Copyrights © Pui Hua and Fun With Little Ones, 2012 - present. Unauthorized use and/or duplication of any materials/photos within this website without express and written permission from this blog’s author and/or owner is strictly prohibited. Excerpts and links may be used, provided that full and clear credit is given to Pui Hua and Fun With Little Ones with appropriate and specific direction to the original content.

Thursday, October 25, 2012

Creative Time with Duplo and Lego


We bought little Ethan his first Mega Block Fire Station set with a fire truck for his 1st birthday. Those are big blocks that come in prime colors - red, blue, yellow. He loved the blocks and still play with it till to date, while the fire truck becomes one of baby Claire's crawling buddies now.

As Ethan grew older we bought him Duplo instead, it's the medium size blocks by Lego designed for toddler under 3+. One thing we love about Duplo & Lego is that all sets can easily integrate, so we can start him on standard set (with just normal blocks for building houses) to other interesting / theme based sets like cowboy town, race car etc.

This was built by Ethan alone when he was 3.5 yo. He explained the full logic behind these blocks to me and I was amazed with his ability to "problem solving"..


At first, there was only the tower. He said it's a defense tower with 2 canons on the sides. Then he built a launcher with a launch button.

Next, he said the canon is spoilt, cannot fire. So he sent an engineer to fix it. But the tower is too tall, so he built a bridge for theengineer to climb over the tower.

Then he said it's too dark, so he built a lamp post and now the engineer can see in the dark.

Atlas, he claimed it's all ready and finally he opened fire.

Pretty structural and logical thought, especially for someone of his age, isn't it? :)


Why do we introduce Mega Blocks and Duplo to our little one at such young age?


  • Firstly, it encourages creativity and imagination. Blocks are just blocks an it takes quite some creative thought to transform them into something interesting.


  • Besides, it is a good time for parent-child bonding without having little one fixated to iPad, TV or or PS games.


  • Develop fine motor skill, handling the blocks require good eye-hand coordination


  • Finally, train up the ability to focus. Designing and constructing requires lot of patience and thinking, so it's ideal to let LO learn to sit still and focus on getting a job done.


  • Apart from structures, hub and I had been engaging Ethan into building a lot of other stuffs:
    - Guns with reloader
    - Ball tower
    - Alphabets tower (giant alphabet)
    - Drinking mug
    - Robots

    I did not managed to keep photos of all of these creations, but I shall make an effort to upload them from time to time. Gesh... Weekends are so fun, how I wish everyday is weekend!

    Copyrights © Pui Hua and Fun With Little Ones, 2012 - present. Unauthorized use and/or duplication of any materials/photos within this website without express and written permission from this blog’s author and/or owner is strictly prohibited. Excerpts and links may be used, provided that full and clear credit is given to Pui Hua and Fun With Little Ones with appropriate and specific direction to the original content.

    Tuesday, October 23, 2012

    Coming Soon - Baby Claire's 1st Birthday

    As Baby Claire is turning 1 in a month's time, I have started making plan for her special day (or should I say, my special day for 1 year post-delivery? How fast time flies..)

    It will be simple celebration with families only at home, however this does not stop me from making it a memorable day with special handmade. :)

    Here is my masterplan, sketched on a piece of small note and still well kept in my purse.

    Theme: Balloons
    Theme Color: baby blue & soft pink


    I'm making good progress and everything is right on track. Both her party dresses are done - one for her early celebration with the grandparents on the eve of her birthday, another for the actual day with my side of family.

    Baby Claire's 1 Year Old Birthday Dress, with a tie-back bow ribbon on the back.
    First version, before alteration. It is a bit long-ish for baby Claire.

    Children On Parade by Sarah Jane, I just love to see the line up of happy kids :)
    I kept the shoulder straps open using button-on design. This will allow me to put up the dress for her at ease and the strap length can be easily adjusted (by re-sewing the button) as she grows taller.
    This dress is similar design as the first baby dress I made 2 months back, I keep the design simple since the fabric itself is sweet and lovely. Would love to see her put on this dress and walk about in her tiny feet :)

    Birthday Dress 2 - Children in Balloons... I love the playful design of this fabric - bunny and little girl are floating with the balloons :)
    Matching bow ribbon.
    I intend to change this to a plain white ribbon and use this bow ribbon for her headband instead.


    Oh, and accessories for her and her little brother are on the way.. must not let the brother feel omitted or sidelined.


    Now that most of the sewing are down, what keep me thinking is the the Minnie chocolate cake I planned to make. I've never tried making a fondants cake of this size, only the cupcakes I made for her full moon celebration. Anyway, I'm determined to have that done and nothing will stand in my way. Wish me luck :)


    Interested to make one yourself?
    I received many inquiries about this particular fabric, I know I know it is too cute to be missed! :) I am using the Children At Play fabric, Play House series designed by Sarah Jane, do drop by her blog to get inspired and further info on where you can purchase this fabric near you. If you ever made a similar party dress for your little girl, feel free to share ya as I really enjoy admiring see other's lovely craft work. :)


    Copyrights © Pui Hua and Fun With Little Ones, 2012 - present. Unauthorized use and/or duplication of any materials/photos within this website without express and written permission from this blog’s author and/or owner is strictly prohibited. Excerpts and links may be used, provided that full and clear credit is given to Pui Hua and Fun With Little Ones with appropriate and specific direction to the original content.


    Thursday, October 18, 2012

    Quick Fix for T Shirt 快速美化童衣


    My little boy is joining school field trip tomorrow and all students are required to wear their uniform for security reason - easier for teachers to spot their students. As I was getting ready his uniform for next morning, I was surprised to see small holes over the uniform! *argh*... thanks to my helper's mighty strength when washing the clothes..

    Not wanting my boy to wear a "defaced" shirt I decided to do a quick fix to beautify his shirt - by sewing on few colorful balloons!


    Looking cute, ain't it? :)


    This was how it looked like awhile ago...

    To fix up, these are the tools I used:
    - Some colorful acrylic felt
    - some threads and a needle (or sewing machine)
    - a pair of scissors
    - cut out pieces from an old shirt (to fix the torn area)

    And here's how I did it...

    1. First, cut a few felt into ballon shapes depending on numbers of letters to form your child's name / initial. I sew my boy's name over the balloons, I'm sure he is going to love these. :)

    2. Fix the holes by sewing a small piece of replacement fabrics on the inner side of the shirt. This is to avoid further tear to the shirt in long run.

    3. Sew on the balloons using threats of contrasting colors, add a string or decorate as you wish.


    Now my little boy has a personalized cute looking uniform to wear for the school field trip, yay! :))

    Oh... And below is the enhanced version of my baby's plain green T where I gave it a little facelift using felt again.. I love playing with pattern :)


    Copyrights © Pui Hua and Fun With Little Ones, 2012 - present. Unauthorized use and/or duplication of any materials/photos within this website without express and written permission from this blog’s author and/or owner is strictly prohibited. Excerpts and links may be used, provided that full and clear credit is given to Pui Hua and Fun With Little Ones with appropriate and specific direction to the original content.

    Monday, October 15, 2012

    Pretty Pillowcase Baby Dress


    I had plenty of beautiful fabric sitting around in my shelf, so I decided to sew something simple last night before they gather more dust. So after coming home from work and put my duo to bed, I started working on my machine again. I've always read about how simple it is to make a pillowcase dress, and due to the simplicity of the design, it can grows with the baby for many months! (you will see why when you scroll down to look at the pic of the dress :)

    Why is it called a pillowcase dress? Well, I can't find a formal explanation for that but I suppose its because this design originated from a pillow case? In fact, all you need is to join 2 piece of fabrics together, yep, it's that simple. :)

    Here is the dress, after 1.5 hour of nonstop sewing. I used a matching satin pink ribbon to match the sweet color tone of the dress. There is extra length at the bottom, so as baby grow, I can just extend the length.


    The original length before I sewed up the edge, can easily fit my baby after she turns 1 (or even 2?).


    I added cotton lining for a neat finishing and extra comfort when wearing.

    My handmade peony flower to add some twist to this otherwise simple dress. I think it really adds a scent of sweetness to the dress (note: this photo was taken when the flower peony was pinned on, I have subsequently sew it on to secure it :)

    Next, I just need to make a matching hairband for this pretty dress. Can't wait to dress up my baby Claire, lol..

    I will try to post up a tutorial when I start making the next pillowcase dress, stay tuned. ;)


    Copyrights © Pui Hua and Fun With Little Ones, 2012 - present. Unauthorized use and/or duplication of any materials/photos within this website without express and written permission from this blog’s author and/or owner is strictly prohibited. Excerpts and links may be used, provided that full and clear credit is given to Pui Hua and Fun With Little Ones with appropriate and specific direction to the original content.

    Saturday, October 13, 2012

    Little Booties for My Walking Baby 可爱学步鞋


    At 10.5 months old, Baby Claire is able to walk around by holding on to the back of a chair, she prefers standing and walking more than crawling now. So I spent some times to make her a few cute booties, all with well padded and non-slip soles.

    These are the recent 2 completed pairs... They are far from perfect but are certainly comfortable and sweet looking. With these well fitting booties, I'm sure she is all ready to learn walking :)


    Purple Bunny Baby


    Lovely ribbon at the back


    Decorated with tiny daisies


    I made her matching hairbands too :)


    Ruby Dream in Polkadots
    With little felt flowers

    This is to match a previous dress I made for my baby :)

    Baby Claire is maneuvering around at ease in her new booties :)


    Do check out the first booties I made for baby Claire here, Little Red Bunny Bootie


    Copyrights © Pui Hua and Fun With Little Ones, 2012 - present. Unauthorized use and/or duplication of any materials/photos within this website without express and written permission from this blog’s author and/or owner is strictly prohibited. Excerpts and links may be used, provided that full and clear credit is given to Pui Hua and Fun With Little Ones with appropriate and specific direction to the original content.

    Wednesday, October 3, 2012

    Brush, Brush, Brush! 刷牙咯!


    I started training Ethan to brush the teeth by himself when he was around 15 months old. He was able to stand steadily and had pretty good eye-hand coordination then. I didn't make record but I am certain he had at least 8 teeth by then.
    Brush, Brush, Brush! by Alicia Padron.


    I started brushing my little boy's tiny teeth when he was 8 months old - he had 4 teeth then. I bought this Pigeon set which have 3 steps toothbrushes within 1 packaging. I like the fact that it comes with a shield that can be attached to the toothbrush to prevent toddler from accidentally pushing the toothbrush too deep down the throat which may cause chocking or injury.

    These tooth brush are useful to help soothe the gum discomfort caused by teething too. Just rub it softly against the teeth and gums.


    I did not follow exactly the age indication showed on the packaging, but they were certainly useful and I managed to introduce brushing as part of my boy's bedtime routine without much resistance.

    After he turned 3.5 years old, he had accepted that brushing before bed is a must and will go and brush his teeth without me asking. I couldn't stop feeling proud to see him being such an independent boy and hope he will grow up with bright white teeth.

    Many mommies had complained of difficulties they faced when training the kiddos to brush their teeth, here are some of the techniques I deployed in cultivating brushing habit in my boy...


  • I started by teaching Ethan to brush with empty tooth brush and gargled with boiled water at room temperature. Once I'm confident that he will not swallow the toothpaste and the water (after gargle), only I applied toothpaste and continued to let him gargled using boiled water.


  • For gargling, I didn't buy any fancy cup, just used the small translucent cup that comes with my Yomeshu, he loves the mini cup and called it his cup. You may consider the measurement cup that comes with some cough mixtures too :) Remember to give your little one a personal face tower to avoid him from wetting his shirt when spitting out.


  • Let him stand on a stool so he is tall enough to see his own reflection in the bathroom mirror. At first I let him watch me brush his teeth, subsequently I let him do it himself, from squeezing tooth paste to brushing, gargling and wiping clean. Most little boy at the age of 2 would want to proof that he is a big boy capable of managing himself. So, make good use of this growing ego :)


  • We always brush teeth together so he felt that it's a norm that all adults brush teeth before bedtime. remember kiddo always likes to imitate what the parents do, so make use of that.


  • Read him books about bedtime, brushing teeth.. Explain to him why he should brush his teeth and consequences of not doing so (teeth turn black, fall off and he will become baby without any tooth..) He was so motivated to brush his teeth after understanding the consequence :)


  • These are some of the books I read to him...


  • Brush, Brush, Brush, by Scholastic. This book actually comes with a bedtime story at reversed print, little Ethan was very captivated by that.


  • The Things I Love About Bedtime, by Trace Moroney. This is a very interesting book with beautiful illustration to encourage a good bedtime habit.


  • I grew up with really ugly teeth when I was in primary school, my childhood photos always remind me of that "ugly past". I certainly hope that having cultivated this habit in my boy, he will not face the terrible toothache pain and horrifying dentist visit like I had before..


    My little boy happily brushing his teeth


    One last note. If you are concerned that your little one may have swallowed the toothpaste, you may use Fluoride-free toothpaste designed for children and pregnant moms, available in most major pharmacies and baby stores.


    Hope you find this article helpful. Happy brushing! :)


    A Note on Safety


  • Never, I repeat, never, leave your little ones left unattended in the bathroom as simple things like razor, toilet seat, can post danger to little ones. Especially if he's standing on a stool there is a danger of losing balance.


  • Copyrights © Pui Hua and Fun With Little Ones, 2012 - present. Unauthorized use and/or duplication of any materials/photos within this website without express and written permission from this blog’s author and/or owner is strictly prohibited. Excerpts and links may be used, provided that full and clear credit is given to Pui Hua and Fun With Little Ones with appropriate and specific direction to the original content.

    Tuesday, October 2, 2012

    Handmade Booties for Little Walker 手织小童布鞋


    My little girl has been crawling on all 4 swiftly since she was 8 months old, at 10 months old now she is learning to walk by holding onto something for support. I decided to sew her a pair of booties that are comfortable so she can learn to walk at ease, and in style.

    After 2 hours of hard work, this is the outcome. It's light (so she won't sweats under our warm weather), pretty looking (took me a while to plan the the color combination), unique (I'm certain you can't find the same pair elsewhere) and most importantly, it's full of mommy's TLC.. :)


    My first ever handmade booties >:)

    "Take us for a walk, will you?"


    The back view, I really like these little pink daisies..


    I slipped them onto her feet in the morning and I was just excited beyond words to see her exploring around our house in this little red bunny booties. :)

    Now I'm ready to make more colorful booties for her to match her cloths... Yay!


    Latest Updates..
    A week later, I finally find the time to make more walking shoes for baby Claire, click here to check them out :)


    Copyrights © Pui Hua and Fun With Little Ones, 2012 - present. Unauthorized use and/or duplication of any materials/photos within this website without express and written permission from this blog’s author and/or owner is strictly prohibited. Excerpts and links may be used, provided that full and clear credit is given to Pui Hua and Fun With Little Ones with appropriate and specific direction to the original content.