Love. Laugh. Learn. A fun journey with Little Ones. A beautiful life with Loved Ones. A crafty mind to inspire my Young Ones.
Friday, September 21, 2012
Ocean and Bella Little Owls
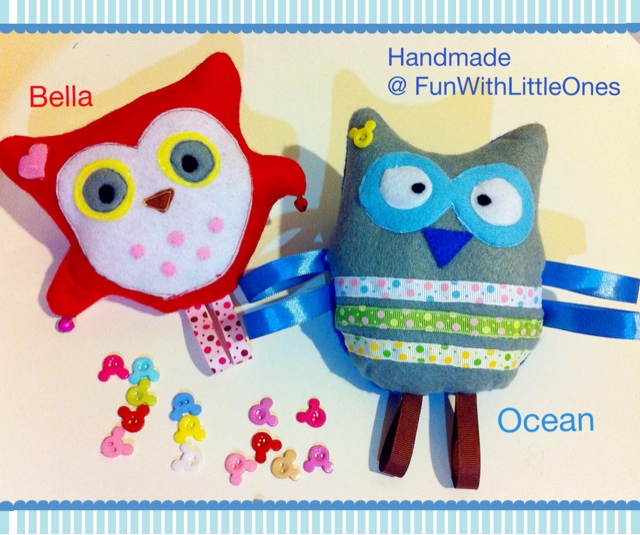
Meet Ocean & Bella, the happy little owl siblings. I made these for my two Little Precious, the owls are designed to represent them in the most unique ways..
Bella, this little red owl has 2 little tinkle bells that make tinkling noise, just right for my little baby Claire who loves noise crinkling toys.
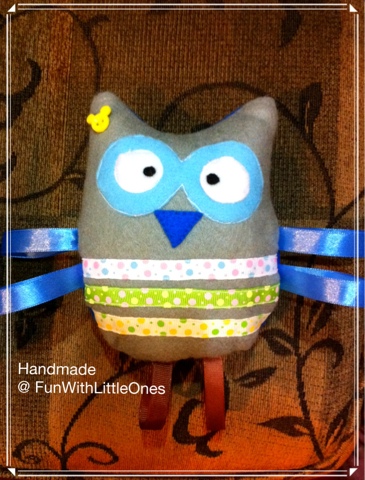
Ocean, the slightly bigger size blue little owl who has a Mickey on his forehead, this is for my little boy who loves Mickey.
Both little owls are playful just like me duo, see how they like to hang around upside down.
I made these little cuties at night and placed them besides their pillows while they were sound asleep. My baby girl noticed it when she woke up and was curiously tossing Bella around :)
Ethan was so happy to see his Ocean and hugged it to sleep with him underneath his blanket instantly. All the efforts are truly worthwhile to see the smiles on their faces.
A Note on Safety
If you are making this or any soft toys for little ones under 3, do avoid using of small objects like buttons or bells which can be chocking hazard. replace with ribbons or embroidery patterns instead.
Copyrights © Pui Hua and Fun With Little Ones, 2012 - present. Unauthorized use and/or duplication of any materials/photos within this website without express and written permission from this blog’s author and/or owner is strictly prohibited. Excerpts and links may be used, provided that full and clear credit is given to Pui Hua and Fun With Little Ones with appropriate and specific direction to the original content.
Tuesday, September 18, 2012
Sewing Project B2: Improved Toddler Pants
After successfully making the first pair of stretchable pants for my little boy, I decided to make him another one with the same fabrics that I used for sewing a little blouse for my baby girl. See the blouse here.
Why I called this improved version? Well, it has 2 added side pockets and folded edges so looks neater and smarter than the previous one.
 |
| Toddler Pants, with side pockets and folded edge |
It also comes with an elastic waist band that is neatly hidden at the back of the pants.
 |
| Stretchable waist with the button holes |
However, having paid attentions to all these details, I made a big mistake - I miscalculated the waist length and when I tried to put it onto Ethan, I failed to pull the pants beyond his buttock! *argg*
I was feeling defeated for a while as I had put significant effort into this pants, it was such a frustrating moment. 2 days later, I decided to make some modification to make it fit - by adding a zipper. So, I learnt to sew zipper for the first time... and here is the outcome of the modified pants.
 |
| Added a 4" white zipper and a front button onto the pants. |
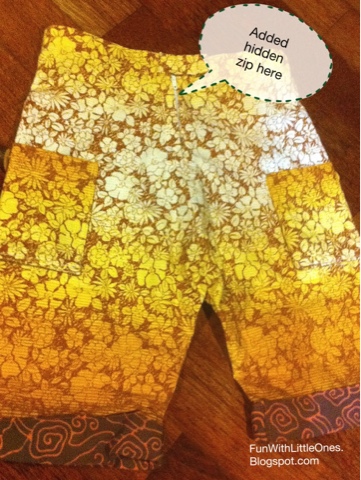 |
| The modified pants that finally fits :) |
Finally, Ethan can wear this new pants made by mommy and look smart in it...Yay!
Wonder how to sew a zipper? Refer to this simple guide on Make It-Love It
http://www.makeit-loveit.com/2011/10/sewing-tips-installing-a-basic-zipper.html
Wonder how to make the side pockets? Refer to Made By Rae's post here.
Quite easy done. :)
Copyrights © Pui Hua and Fun With Little Ones, 2012 - present. Unauthorized use and/or duplication of any materials/photos within this website without express and written permission from this blog’s author and/or owner is strictly prohibited. Excerpts and links may be used, provided that full and clear credit is given to Pui Hua and Fun With Little Ones with appropriate and specific direction to the original content.
Friday, September 14, 2012
Tutorial: Finger Puppets - Little People 手指小玩偶
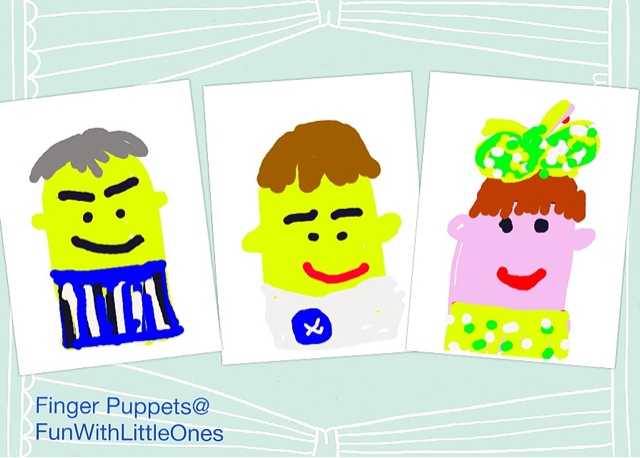
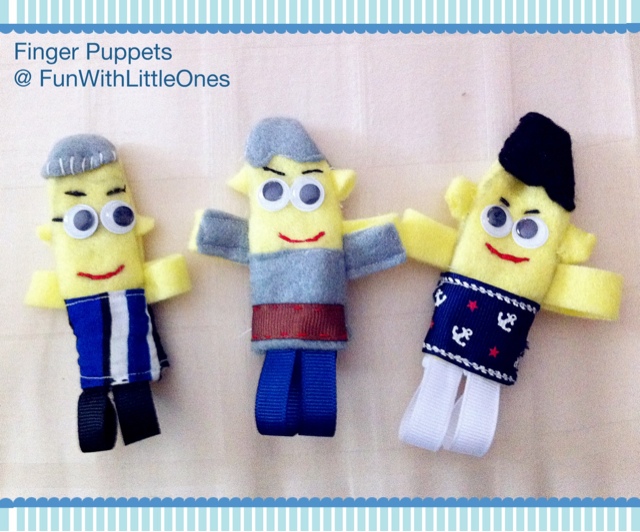
I've ordered some felt recently to make more owl soft toys, however since Ethan's grandpa has been unwell for a while, I thought of making family finger puppets for Ethan to put up a puppet show to cheer him up. So I did some research, made some sketches on my iPhone and started making these little puppets one night, after putting the duo to sleeps.
From concept...
To reality!
Fit into the fingers just nicely, yay!
Grandpa, little boy and little girl "hanging out" together :)
Ethan putting up a puppet show for me over coffee break..
How to make?
It only takes a few simple steps to complete each puppet, however you need to have some patience and creative juice :)
1. Cut the felt according to your finger shape plus extra of 2cm (so it will not be too tight after sew). Decorate using ribbons, buttons, fabric or whatever available tools.
2. Turn the decorated felt inside out and sew the left and right side together. Keep the bottom opened to leave space for the finger.
3. Flip them over and your finger puppet is done! This is actually the most tricky part, you may used a pen to help push the corner outward.
4. If you have giggle eyes, just glue them using super glue. I purposely left this step for my little boy to complete so he felt the sense of ownership and participation :)
I shall continue to make more family members later when time allows, till then, stay tuned and happy crafting! ;)
Note: feel free to like my Facebook page by clicking the "like" button on the side panel or "become a fan" button at the bottom of this page to get instant update on all postings..
Tips
If you are interested to try out handmade soft toys or puppets, do buy some felts as they are ideal for handcraft work and do not fray. These lovely colorful cloths are usually sold in small cut size like A4 paper size, or you can buy by yard too.
Copyrights © Pui Hua and Fun With Little Ones, 2012 - present. Unauthorized use and/or duplication of any materials/photos within this website without express and written permission from this blog’s author and/or owner is strictly prohibited. Excerpts and links may be used, provided that full and clear credit is given to Pui Hua and Fun With Little Ones with appropriate and specific direction to the original content.
Saturday, September 8, 2012
Tutorial: Noisy Hanky Owl Soft Toy 手巾猫头鹰公仔
I am not sure if it's just me, I had accumulated many hankerchiefs for my little ones over the times. Most of these hankies are made of soft towel materials but over the time the color faded or they got out of shape after numerous washing.
Since I've learnt how to operate a sewing machine recently, I just had this idea of recycling the hanky and left over fabrics for good use by turning them into soft toys. After all the texture would be just right for baby, soft and mild.
I put my plan into action last night and this was the outcome, a little owl soft toy. My little boy was so excited to participate in the making of this little owl. Now he really thought his mommy is capable of doing anything and everything. Lol.
Meet Olie, the Little Owl.
What You Need
For the owl body:
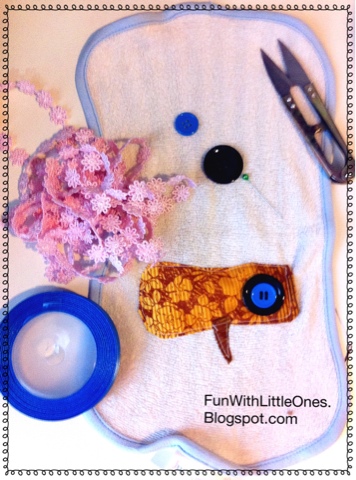
1 colorful hanky, rectangular shape preferred
2-4 round buttons for the eyes OR cut circular shapes felt for the eyes. Explore with different color combination
Few stripes of fabric or ribbons for the wings and tummy as decoration
Thread of matching colors and needle
Few fabric pins
A pair of small scissors
For the inner stuffing:
Cotton / synthetic pallets / batting, as most tutorials suggested. However since this was a spontaneous decision in the middle of the night, I did not have any readily available stuffing materials. So I used my baby's old cloth diaper made of muslim fabric instead. Another recycled item. :)
A piece of used food wrapper for the clingy effect, cleaned (optional)
There is no special tools required to complete this soft toy, however having a sewing machine does make it quicker.
Now that you have got all materials ready, let's get started!
1. Decide which side is the front of the owl, start by sewing the eyes area (cut a fabric or felt like a "8" shape). Use buttons as eyes and cut a small triangle shape for the nose. Secure the fabric with pins, and sew on tight.
2. Sew few stripes of ribbons or old fabric below the eyes as the tummy.
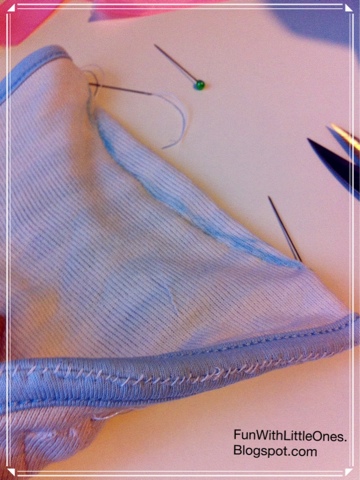
3. On the wrong side of the hanky (the inner side), fold it on equal length, use pins to secure the positions and sew the owl's forehead like a curve shape. Continue to sew both side of the hanky to join the body. Keep the bottom opened (about 5") as you need to insert the stuffing.
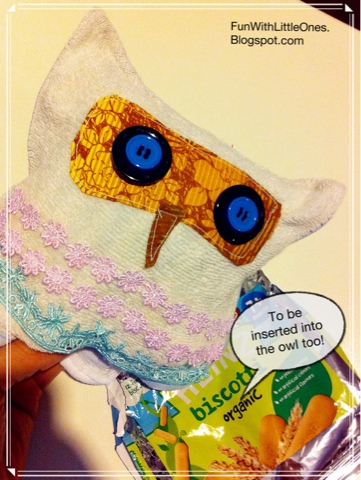
4. Now, turn the hanky over, use a pen to push the pointy ears out and insert the stuffing (batting, microfiber or the Muslim cloth). I added a piece of cleaned food wrapper for that crumbled noise effect that most baby would love :). Alternatively, you can insert a small bell and this will becomes a rattling owl instead.
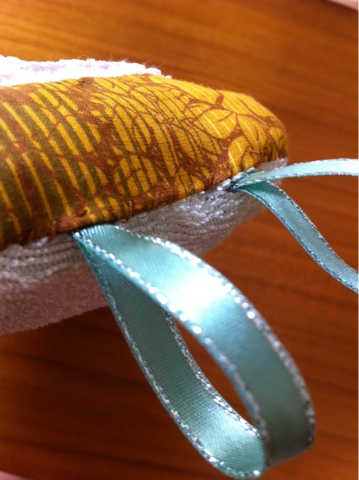
5. Seal the bottom of the owl's body by hand sew, cut 2 ribbons about 4" each, fold half and sew on as the legs. You can use these ribbons to hang over your fingers when playing with baby, so remember to reinforce it with extra stitches.
6. Finally, sew on a piece of fabric or some ribbons right above the legs for a neat finishing. I only sewed on for the front of the owl, you can extend to cover the back if you would like to.
That's all the steps, not that difficult after all. I had placed order for some felt and beautiful ribbons so when those arrive, do expect for more pretty owly creations.
Update...
A week later, I fine tuned my design and made 2 new owls with felt and colorful grosgrain ribbons I bought. They turned out way better than my first prototype.
Meet Ocean & Bella, the happy little owl siblings. Bella has 2 little tinkle bells, just right for my little baby and Ocean has a Mickey button, as requested by my little boy who is a fan of Mickey Mouse Club House. :)
To my delight, my little boy really liked his little owl and used it for role play, even read story book to it during bedtime. So when time allows I shall create a little owl family for him. :)
Hope this post inspires you to sew something today, thanks for stopping by!
Useful Tips!
Since I've learnt how to operate a sewing machine recently, I just had this idea of recycling the hanky and left over fabrics for good use by turning them into soft toys. After all the texture would be just right for baby, soft and mild.
I put my plan into action last night and this was the outcome, a little owl soft toy. My little boy was so excited to participate in the making of this little owl. Now he really thought his mommy is capable of doing anything and everything. Lol.
Meet Olie, the Little Owl.
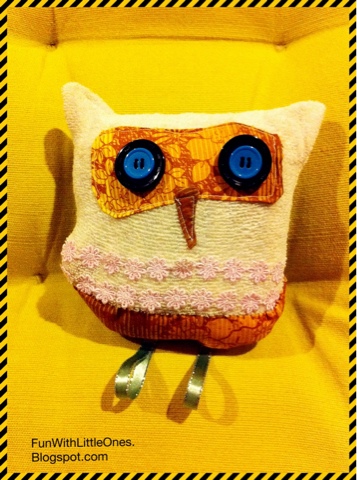 |
| Hello World, here comes Olie the owl :) |
 |
| I love to play at night. |
What You Need
For the owl body:
For the inner stuffing:
There is no special tools required to complete this soft toy, however having a sewing machine does make it quicker.
Now that you have got all materials ready, let's get started!
Little Owl in 6 Simple Steps:
1. Decide which side is the front of the owl, start by sewing the eyes area (cut a fabric or felt like a "8" shape). Use buttons as eyes and cut a small triangle shape for the nose. Secure the fabric with pins, and sew on tight.
2. Sew few stripes of ribbons or old fabric below the eyes as the tummy.
3. On the wrong side of the hanky (the inner side), fold it on equal length, use pins to secure the positions and sew the owl's forehead like a curve shape. Continue to sew both side of the hanky to join the body. Keep the bottom opened (about 5") as you need to insert the stuffing.
4. Now, turn the hanky over, use a pen to push the pointy ears out and insert the stuffing (batting, microfiber or the Muslim cloth). I added a piece of cleaned food wrapper for that crumbled noise effect that most baby would love :). Alternatively, you can insert a small bell and this will becomes a rattling owl instead.
5. Seal the bottom of the owl's body by hand sew, cut 2 ribbons about 4" each, fold half and sew on as the legs. You can use these ribbons to hang over your fingers when playing with baby, so remember to reinforce it with extra stitches.
6. Finally, sew on a piece of fabric or some ribbons right above the legs for a neat finishing. I only sewed on for the front of the owl, you can extend to cover the back if you would like to.
That's all the steps, not that difficult after all. I had placed order for some felt and beautiful ribbons so when those arrive, do expect for more pretty owly creations.
Update...
A week later, I fine tuned my design and made 2 new owls with felt and colorful grosgrain ribbons I bought. They turned out way better than my first prototype.
Meet Ocean & Bella, the happy little owl siblings. Bella has 2 little tinkle bells, just right for my little baby and Ocean has a Mickey button, as requested by my little boy who is a fan of Mickey Mouse Club House. :)
To my delight, my little boy really liked his little owl and used it for role play, even read story book to it during bedtime. So when time allows I shall create a little owl family for him. :)
Hope this post inspires you to sew something today, thanks for stopping by!
Useful Tips!
- Make sure you choose hanky and fabric/ribbons of contrasting colors for a better visual result; strong colors are more ideal especially for kid toys.
- If you are planning to give this to a young baby, make sure you sew the buttons securely as buttons can be choking hazard. Otherwise, use a piece of felt cut in round shape instead.
Copyrights © Pui Hua and Fun With Little Ones, 2012 - present. Unauthorized use and/or duplication of any materials/photos within this website without express and written permission from this blog’s author and/or owner is strictly prohibited. Excerpts and links may be used, provided that full and clear credit is given to Pui Hua and Fun With Little Ones with appropriate and specific direction to the original content.
Wednesday, September 5, 2012
Lets Start Counting!
Apart from creativity and curiosity, which is attitude to life, there are 2 learning that I put emphasize on -- language and mathematics. These are the basic for learning greater things in life so I really think its important to build a strong foundation since young.
Whether you like it or not, mathematics is so important in our everyday life. From simple tasks like grocery shopping, ordering food, going places (taking bus or lift) to serious stuff like bank savings, financial investment, property purchases and even tax payment... its all about numbers, numbers, numbers. So, big guy and I had worked together in cultivating interest in numbers to Ethan when he was as young as 8 months old.
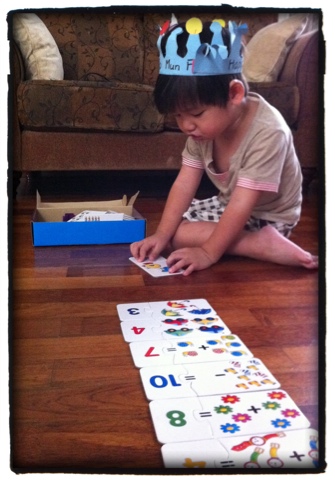 |
| Ethan, just turned 3 yo, playing with simple math cards |
Here are the different tools and techniques we used along the way. Some are ready purchased, some DIY. Choose whichever methods that work for your little ones, but what most important is always make learning fun & interactive. I strongly believe these are the keys to cultivate a kid who enjoys learning.
Start with the Basic - Counting with Abacus
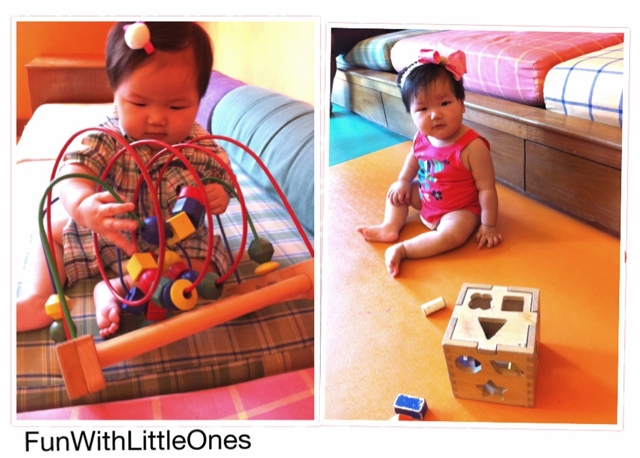
We got this abacus from IKEA to teach simple counting from 1-10. Baby Claire loved to play with the colorful beads, she turned the beads around and laughed about it. I let her be but at the same time, will count the bead one by one as she watched on.
For her elder brother, we used this to teach the concept of addition, e.g. 1 bead + 1 bead = 2. 10 beads + 10 beads = 20 and etc
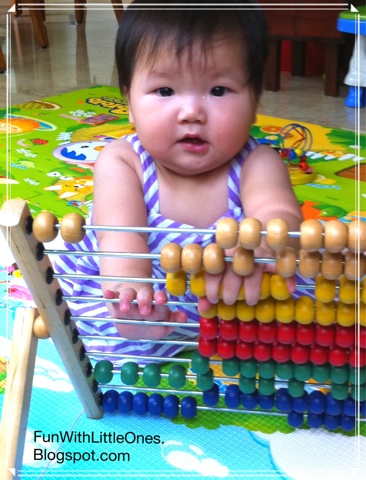 |
| Baby Claire having fun with the abacus |
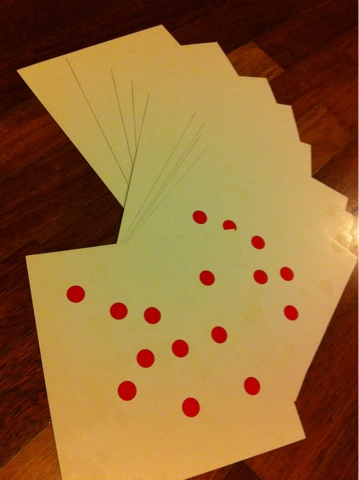
Basic Counting with Dots
I got these dots cards from Popular book store and flashed them to baby every day, starting from 1-5, 5-9 then slowly increase to 20, 30 etc.
For Beginner Learning: Addition and Subtraction with Pictorial Cards
When Ethan was 2.5 yo, I used this pictorial mathematics cards set to teach him the basic of addition and subtraction. Began with smaller numbers 1-5, I gradually increased to 6-10. He excelled in this after few times of teaching and most of the time he just played by himself. At time he even tried teaching me and he told me this one day, "Mommy, this is too difficult for you. Let me show you how to do this.". *eyes rolling*
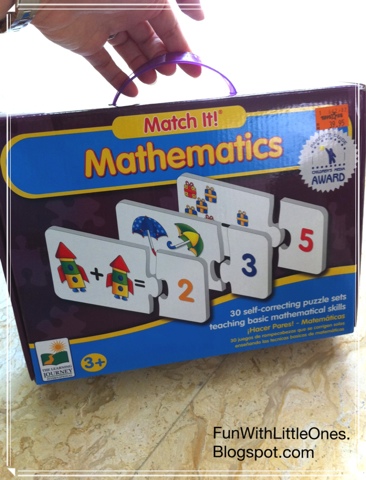 |
| Match It! Math cards from Toy 'R Us |
For Advanced Learning: Addition and Subtraction with Numbers
After Ethan had grasped the basic of addition, daddy prepared these DIY cards to teach him simple addition from under 5, to under 10, then eventually moved on to bigger numbers. We taught him to use fingers for counting too.
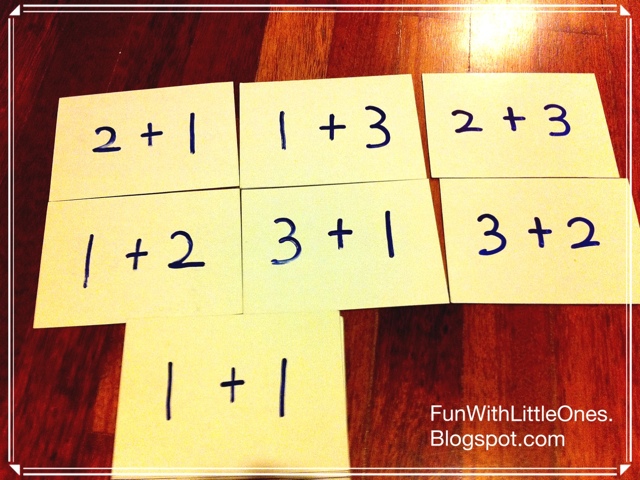 |
| DIY Math Cards by daddy |
Interactive Learning Through Singing
Apart from the above tools, counting can be candid and as simple as using fingers, candies, finger puppets or whatever items you have with you. In fact, if you are staying in a double story house, the best time to practice counting is when going up and down the staircase. That was how Ethan learnt 1-20 as our staircase have exactly 20 steps. :)
Below are some nursery rhymes that are perfect to teach numbers:
"1 little, 2 little, 3 little fingers,
4 little, 5 little, 6 little fingers,
7 little, 8 little, 9 little fingers,
10 little small fingers"
modified from the 10 little Indian songs.
"1,2,3,4,5,
Once I caught a fish alive,
6,7,8,9,10,
Then I let it go again."
For Mandarin
"1,2,3,4,5,6,7,
我的朋友在哪里?
在这里,在这里,
我的朋友在这里"
把"朋友"换去小宝贝的名字,他一定会很开心很投入. :)
The Benefit of Doing All These?
When I first started flashing the number cards to Ethan, he was around 10 months old and apart from staring at those cards or trying to grab them from me, I couldn't tell how much he understood. I persisted regardless and he understood the numbers after turning 1 although he was not able spelled them yet.
At 18 months old, we took Ethan for a road trip and as we were on our way home, he suddenly lifted his little fingers and started counting 1.. 2.. 3.. 4.. 5.. 6.. 7.. 8.. 9.. 10! He counted them soft and steady, although his "seven" sounded more like "swen" and his "five" sounded like "fie", Big Guy and I were so astonished beyond words. Ethan was obviously feeling so pleased with himself that he repeated counting for a few times. Since that day onward, he just started saying those numbers without any problem.
At around 2.5 years old, while waiting for our lunch to be served at a restaurant, I gave Ethan a piece of blank paper to doodle, with some crayola pens. He suddenly wrote the number 1 - 10 and showed it to me with a shy smile. Again, he took us by surprise. His handwriting wasn't great and not all strokes are correct, but considering he wrote this on his own effort without any prior training (his preschool had not started him on writing skill yet and neither did I), I was really glad that he shown the initiative to learn and try new things on his own.
 |
| Ethan's first effort of writing numbers at 2.5 yo |
So, for parents who are reading this, please don't give up on your kiddos if they are not showing you the response you wanted. Our little ones are like sponge absorbing whatever we teach them, make sure you teach them the right things and give them time to proof to you when they are ready. :)
What Next?
Keep repeating the above activities every now and then to reinforce the learning. Once we have figured out how to teach him multiplications and division, I shall update with a new post... If i can find the time.
Happy counting! ;)
Note to Parents and Caretakers
This sharing is purely from our own research and available resources at hands, neither of us are child education experts. So please read this as a sharing and you shall choose to adopt whichever methods that best suit your little ones. Besides, please remember that every child's development is different, so do not compare your little ones with others, everyone is unique in their own way and as parents, we love our kiddos for being who they are, not what they are capable of.
Copyrights © Pui Hua and Fun With Little Ones, 2012 - present. Unauthorized use and/or duplication of any materials/photos within this website without express and written permission from this blog’s author and/or owner is strictly prohibited. Excerpts and links may be used, provided that full and clear credit is given to Pui Hua and Fun With Little Ones with appropriate and specific direction to the original content.
Monday, September 3, 2012
Family Trip to the Beach, Avillion @ Port Dickson
It must have been the longest period since we last had a family holiday. Now that baby Claire is 9 months old and can understand simple instructions, we decided to bring the duo for a short family trip. A few destinations were in our considerations - Langkawi, Club Med Cherating, Penang island.. but we finally settled with Avillion resort at Port Dickson, for a few reasons:
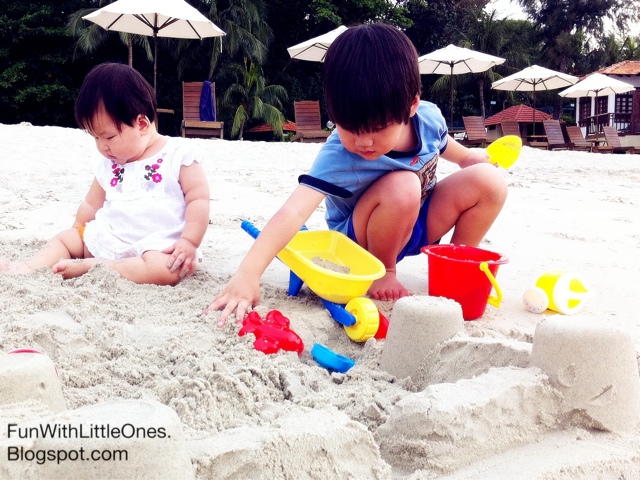 |
| The siblings enjoying the beach |
 |
| My summer baby, all ready for the beach! |
I'm glad we had chosen this place. We had an enjoyable stay, good food and the duo thoroughly enjoyed themselves.
These are the things we like about Avillion resort:
 |
| Baby Claire enjoying herself at the Kid's Cabin |
 |
| Little Ethan helping daddy to build a sand castle... |
 |
| Baby Claire tried to help too.. |
Of course there are other activities such as water sports, fishing, complimentary tai chi, free shuttle service to the town etc offered by the resort, since we did not used any of these I'll not make any comments.
However, personally I would think the place could be improved to make it more child friendly:
Anyway, all in all it was a good trip and all of us came home happy.
Useful Tips for the Parents / Caretakers!
1. To ensure the trip is more enjoyable, I've packed along the following for the trip. These are my recommendations for a typical family trip:
 |
| Finger food and instant organic rice cereal for baby |
- Paracetamol / Ibuprofen for fever
- Rescue / antiseptic cream for bites, cuts and burns
- Eucalyptus oilment (如意油) for stomach discomfort
- plaster
- torch light
2. Some additional items for beach visit:
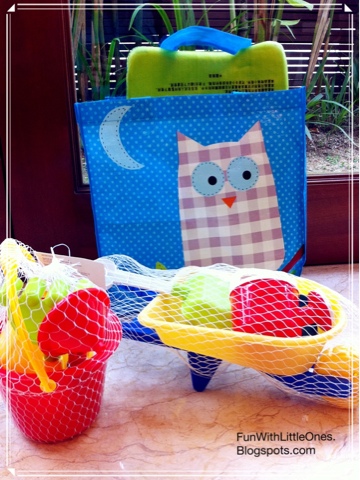 |
| Some of the beach toys. I love the beautiful Owl plastic bag from Toy 'R Us. |
3. If you are taking little one for night walk at the park, dostop by the tennis court and you'll noticed each of the lamp post has a peacock resting on it.
4. IMPORTANT: When playing with sand, keep a close eye on little ones to ensure they do not rub their eyes with hands full of sands. Bring a small bottle of water to wash their hands and a towel to wipe.
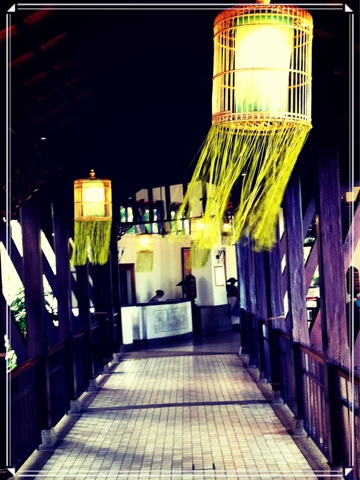 |
| The satin lanterns welcoming us at the resort, swaying under the soft sea breeze.. |
Longing for a trip too to the beach too?
For more information on Avillion resort, you may visit their homepage below:
http://www.avillionportdickson.com/
Their Kiddie Treat package
http://www.avillionportdickson.com/pages/kiddiestreat.html
Have fun! :)
Copyrights © Pui Hua and Fun With Little Ones, 2012 - present. Unauthorized use and/or duplication of any materials/photos within this website without express and written permission from this blog’s author and/or owner is strictly prohibited. Excerpts and links may be used, provided that full and clear credit is given to Pui Hua and Fun With Little Ones with appropriate and specific direction to the original content.
Subscribe to:
Posts (Atom)
