Friday, December 18, 2015

Make Your Own... Christmas Craft!


Christmas is one of our favorite holiday of the year, a peaceful and meaningful occasion that unites us with the loved ones. The kids love it the most too as that's the time they receive gifts (who does not like presents? *laugh*)

The duo and I setup the Christmas tree, lighted it up but we wanted to make our home really really Christmas-ty, so we started making more some Christmas craft. Here's how make your own Christmas decor with with absolutely no cost! 


Using plain papers, we've cut out lots of shapes - snowflakes, Christmas cottages, Christmas trees, and even volcanoes..


Then we made Christmas cards.


Next we made an ever Christmas wreath. Since it is made of fresh Christmas tree twigs, it smells so good and we decorate it with fresh flowers from our garden everyday.. 


Then we deployed these crafts all around  the house. By using blue tac stickers, the papers stick on easily without damaging the surface. The duo were so excited going around the house sticking on their Christmas cottages and trees... They we so proud as they showed daddy later at night.


Make Your Own... Popsicle Stick Tree!

You can either purchased a set of ready packed craft set (E received it as birthday pressie last year) or buy the Popsicle sticks from stationeries or bakery supplies stores. Then just glue, paint, stick!


What about some sparkly stars too? 


Make Your Own... Snowflakes! 
We followed these simple steps to fold the paper and just cut out any shapes of snowflakes we like, it was too challenging for C as the paper is rather thick to cut, so I let her design and I did the cutting for her.. You can practically design endless shapes, creativity is your only limit!


Make Your Own... Felt Christmas Tree!

Not to forget, our cute felt Christmas tree which functions as a child play too.

This Christmas tree was made with large button holes to let little ones learn to button on and off. It served its purpose well - both E and C practiced by themselves and can handle buttons well now, and it is such a pretty addition for the door :)


Not a crafty person? This is a super easy one that requires no crafting interest at all..

Just get a real small size Christmas tree from IKEA for only RM8.90, hang  some golden ornaments or balls and it is perfect addition for indoor or the garden.. Well, will have to change it to a beautiful pot thou. *smile*


That's all peeps, easy-peasy craft to brighten the home. 

Hope you have a wonderful time bonding with your little ones and celebrating with your loved ones..


Xoxo,
PH


Copyrights © Pui Hua and Fun With Little Ones, 2012 - present. Unauthorized use and/or duplication of any materials/photos within this website without express and written permission from this blog’s author and/or owner is strictly prohibited. Excerpts and links may be used, provided that full and clear credit is given to Pui Hua and Fun With Little Ones with appropriate and specific direction to the original content.

Tuesday, December 8, 2015

Paleontologist for a day @ Dinosaur Discovery


It's school holiday and the duo are staying home with me most of the time. I was planning to meet up with my buddies and at the same time do not want the duo to feel neglected (afterall school holiday should be fun isn't it?). Since I am meeting up them at Avenue K Shopping Mall, I thought of just bringing the duo to the Dinoscovery located at the roof top.
We spent about an hour at the dinosaur Discovery center, while its quite a small setup, it was educational and fun. The dinosaurs on display are of actual scale and will move their heads or bodied so gave a vivid feeling (too bad the Pterosaurs were just stationed, would be nice if they actually could "fly" around). My girl was petrified by the Tyrannosaurus when it opened its big mouth and went hiding behind me. Lol.
  
We were given vests, head lamp, maps and an RFID tag as if we were the paleontologists. The kiddos were really excited as it felt like the real thing.

The kiddos were given a map each to collect stamps along the way. Upon completing this map (optionally, complete some questions about the Dino too), you will be given a certificate upon exiting. However, personally I would think they should have provided each of us a headlamp and an RFID tag too since the ticket charge is not cheap.

Showing off their certificates.


What to expect?
There were about 20 types of dinosaur species on display (rough count, visitors were not allowed to take pictures), and there were some activities available to make the visit more exciting. Among those we have tried are..

Attack with an Angkylosaurous tail. E wore the tail on his back and use it to hit the sand bag, it's heavy and hard to aim!

• Rock climbing. E and I completed the climb while C was too scared as there were some Pterosaurs hanging above.

Race with the Theratop. We took turn to race with the creature and the duo was really trying hard!

Shooting mosquitoes with air guns. Up to 8 shots per person.

Errupting Volcano & Sandpit at the children play area, the duo were having lots of fun with the volcano. 


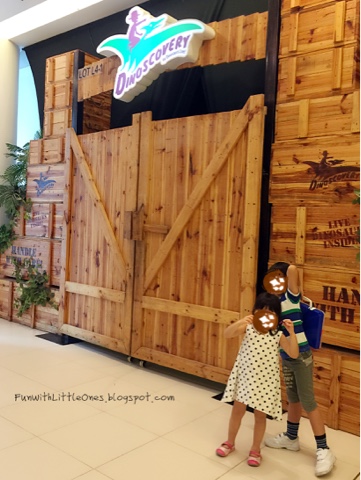
At the entrance.


At the exit, there is some a cafe and a coloring corner for the kids to wind down.

You can opt to buy your pictures too. I didn't, so just took a snap of the LCD display.. ;P


Need more information? Here you go..

Ticket price (available online too):
RM25(MyKad adult) | RM40 (adult) 
RM35(MyKid child) | RM50 (child)

Free admission for children under 60cm
Special discount for Maxis and CIMB cardholder.

Location: 
Level 4, Avenue K, 
156, Jalan Ampang, 
Kuala Lumpur.

Operating Hour: 
Weekdays 10am - 7pm 
Weekends 10am - 8pm

For more info, visit their website: http://discoveria.com.my/


Have fun & enjoy the holiday!


Copyrights © Pui Hua and Fun With Little Ones, 2012 - present. Unauthorized use and/or duplication of any materials/photos within this website without express and written permission from this blog’s author and/or owner is strictly prohibited. Excerpts and links may be used, provided that full and clear credit is given to Pui Hua and Fun With Little Ones with appropriate and specific direction to the original content.

Monday, December 7, 2015

{Christmas Special} Pop Up Christmas Tree Card


The kiddos are spending home with me this holiday season so I though of doing a series of Christmas crafts with them. Good for bonding and to have some decoration for the home & family too. 

After the Christmas Wreath I made last weekend, I found it is not quite suitable for little ones with the use of hot glue gun (I burnt my fingers few times), I decided to start with activities that are kids-friendly and something that would be fun... So when I told them we are making Pop-Up Christmas Tree card, they got super excited. I have not met a kids who do not like pop-up so far. I insisted they had to call me Teacher PH instead of mommy, they loved the idea! Lol.

We had a good 45 minutes making these cards. From left to right - by Ethan, by teacher PH, by Claire. 


The duo drew, cut, glued and decorated the card all by themselves. I just gave suggestions and jumped in for damage control, e.g. When Claire accidentally squeezed too much glue or could not cut a round Christmas ball. So these cards may not be perfect, but are truly their own artwork. I am emphasize on the kiddo's learning progress than to cheat a perfect outcome.

Ethan and I completed this wrapping paper strips Christmas trip for the card cover. He found the paper stencil punchers so we made some flower & little people punch holes, how cute!

The pop-up Christmas tree with 2D gift box. Noticed the little soldier I added? *smile*

The pop -up Christmas tree as done by Ethan. He dedicated it to Yuky 姐姐, one of my buddies whom we are meeting up for lunch later.

It was a total mess on our dinning table, but we managed to clean up within 10'minutes. The kiddos had been trained to clean up and we have a pretty good team work by now. :)


What you need to make some Christmas cards with your little ones..
• Some colorful papers
• child-friendly scissors 
• artwork glue
• used wrapping papers / ribbons / buttons / washi tapes 
• pencils & market pens
• paper stencil punchers (optional but adds fun to the making)
• cutters (optional, NOT SAFE FOR KIDS)
• old newspapers to protect the work surface
• some creative juice ;-) 

Here's the simple tutorial on how to make the pop-up tree..


Cheers!

Xoxo,
PH


Copyrights © Pui Hua and Fun With Little Ones, 2012 - present. Unauthorized use and/or duplication of any materials/photos within this website without express and written permission from this blog’s author and/or owner is strictly prohibited. Excerpts and links may be used, provided that full and clear credit is given to Pui Hua and Fun With Little Ones with appropriate and specific direction to the original content.

Saturday, December 5, 2015

{Tutorial} DIY Christmas Wreath


It's December, my favorite month of the year! It's time for birthdays, holiday and Christmas!

I have been thinking of getting a Christmas wreath for our front door, but somehow I was secretly hoping for something that is real and evergreen.

God must have heard my wish, this morning I saw my neighbour's gardeners trimming down his Christmas trees. A lot of branches were cut and discarded, and and I thought they are just perfect for making a fresh Christmas wreath.

So I asked the gardeners to spare me some nice cuttings, and they generously gave me a bunch. I made this in 30 minutes - A DIY Christmes wreath that gives a fresh scent of greens. All natural and free!


It looks great over a dark green background too.

To make this, you need the following:
• 2 wired hangers 
• 1 cable protector (from IKEA)
• 2 dozen Christmas tree cuttings *
• 1 hot glue gun & hot glue sticks
• some Christmas ornaments
• 30cm long red ribbons 

* if you cannot find fresh Christmas trees, you may use the store bought plastics leaves.


The Making:

1. Using your hands, bend the hangers into a round shape (it's ok if it is not a perfect Robb's, it is not noticeable once you cover it up with the leaf)

2. Covered it up with a cable protector. Seal the opening with the hot glue gun.

3. While waiting for the hot glue gun to heat up, cut each Christmas tree cuttings into about 4"-6" in length.

4. Using the hot glue gun, glue one cutting at a time in one direction until it's fully covered. 

5. Inspect for any uncovered spots, conceal with smaller cuttings.

6. Glue on th Christmas ornaments of your choice (suggest to get something light)

Tie a ribbon over the hanger's hook and your Christmas wreath is done! Now go ahead, hang it up to impress your guests and neighbors.. *smile*

Cheers!


Xoxo,
PH


Copyrights © Pui Hua and Fun With Little Ones, 2012 - present. Unauthorized use and/or duplication of any materials/photos within this website without express and written permission from this blog’s author and/or owner is strictly prohibited. Excerpts and links may be used, provided that full and clear credit is given to Pui Hua and Fun With Little Ones with appropriate and specific direction to the original content.